Mozilla Firefox
How to Bypass Geo-blocking to Access Content with Firefox Extension for Free.
ProxMate is add-on which lets its user bypass the geo-location based restriction to access your favorite content or service(s). ProxMate is available for all the popular browsers like Google Chrome, Mozilla Firefox and Opera.
Why you should use Proxmate (according to author)?
- Faster – Claims to be faster than VPN.
- Pluggable – ProxMate allows you to pick exact package of the service(s) which you would like to access.
- Secure – SSL will stay SSL.
- Open Source – No more secrets.
- Support.
Developer(s): Personalitycores.
Language support: English
Home page: ProxMate
Difficulty: 
Availability: 
![]()

Download: Add to Firefox
HOW TO: Installing ProxMate on Mozilla Firefox:
1. Go to ProxMate Mozilla add-on page, or simply click on the above download link and click on “Add to Firefox“.
2. If Mozilla Firefox asks user permission for installation of addon. Click “Allow” to continue installation, leave it to abort.
3. ProxMate installation box pops-up. Click “Install Now” to continue installing add-on, “Cancel” to abort installation.
4. On successful installation, ProxMate doesn’t require restart to activate the add-on.
HOW TO: Using ProxMate on Mozilla Firefox:
1. On successful installation, you will notice ProxMate button at top right side of the browser, next to Mozilla’s “Open menu“.
2. Click on it to install the package(s). You need to install specific package to bypass specific service restriction. For sake of testing, I tried Vevo.
3. Before and after installing the ProxMate’s Vevo package.
HOW TO: Disable/Remove ProxMate from Mozilla Firefox:
1. Click on the Firefox, located at left upper corner of the web browser and go to “Add-ons”.
or press “Alt“, Menu bar pops-up, then go to Tools > Add-ons, or you can simply use shortcut key “Ctrl+Shift+A” to access add-on (extension) manger.
2. Now, click on “Disable” to disable the add-on temporarily or click “Remove” to remove the add-on permanently from the browser.
NOTE: Both options doesn’t require restart for the actions to take effect.
Read, Reply, Mark, Delete Emails right from the Browser with Gmail™ Notifier Plus Extension.
Gmail™ Notifier Plus is an add-on for Mozilla Firefox which alerts its users of new email messages from Gmail. With improved and minimalistic UI, this add-on is easy to use. Users can also ready, delete or mark the emails, all without need to open Gmail Tab.
Features:
1. No requirement to enter your credentials.
2. Multiple label support.
3. Low bandwidth usage by using RSS technology.
4. See your complete Gmail inbox in the toolbar Panel.
5. Counter of unread emails from all your email labels.
6. Play a Beep sound when new email(s) arrives (to enable this feature see extension options page).
7. Show a notification popup when new email(s) arrives (to disable this feature see extension options page).
Developer(s): Alexis Jaksone, Belav
Language support: English
Home page: Fastest Gmail.
Difficulty: 
Availability: 

Download: Add to Firefox
HOW TO: Installing Gmail™ Notifier Plus on Mozilla Firefox:
1. Go to Gmail™ Notifier Plus Mozilla add-on page, or simply click on the above download link and click on “Add to Firefox“.
2. If Mozilla Firefox asks user permission for installation of addon. Click “Allow” to continue installation, leave it to abort.
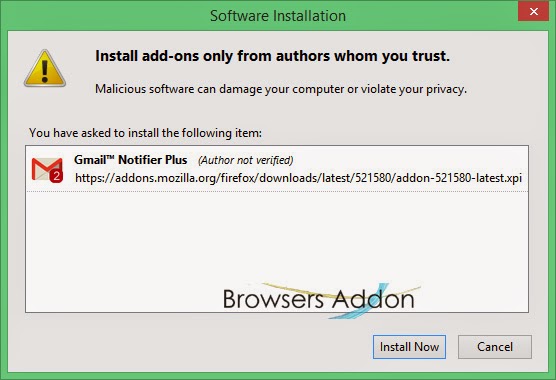
3. Gmail™ Notifier Plus installation box pops-up. Click “Install Now” to continue installing add-on, “Cancel” to abort installation.
4. On successful installation, Gmail™ Notifier Plus will notify the same, this add-on doesn’t require to activate the add-on.
HOW TO: Using Gmail™ Notifier Plus on Mozilla Firefox:
1. On successful installation, you will notice that Gmail icon will appear at top right side of the browser.
2. Click the Gmail icon, log-in with Gmail credentials. On successful login, you will be able to access the email(s) from Gmail.
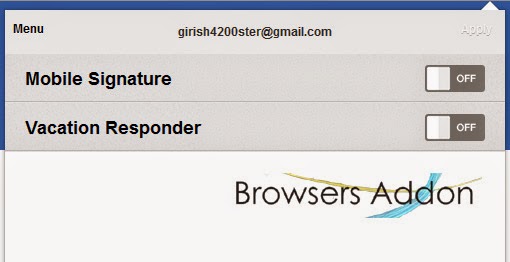
3. Minimal settings.
4. Notification popup upon arrival of new email.
HOW TO: Disable/Remove Gmail™ Notifier Plus from Mozilla Firefox:
1. Click on the Firefox, located at left upper corner of the web browser and go to “Add-ons”.
or press “Alt“, Menu bar pops-up, then go to Tools > Add-ons, or you can simply use shortcut key “Ctrl+Shift+A” to access add-on (extension) manger.
2. Now, click on “Disable” to disable the add-on temporarily or click “Remove” to remove the add-on permanently from the browser.
NOTE: Both options doesn’t require restart for the actions to take effect.
How To: Measure the Pixel Size Right Away from the Firefox Browser.
Developer(s): Kevin Freitas
Language support: English
Home page: MeasureIt
License: N/a
Donate: Click here
Difficulty: 
Availability: 
Download: Add to Firefox
HOW TO: Installing MeasureIt on Mozilla Firefox:
1. Go to MeasureIt Mozilla add-on page, or simply click on the above download link and click on “Add to Firefox“.
2. If Mozilla Firefox asks user permission for installation of addon. Click “Allow” to continue installation, leave it to abort.
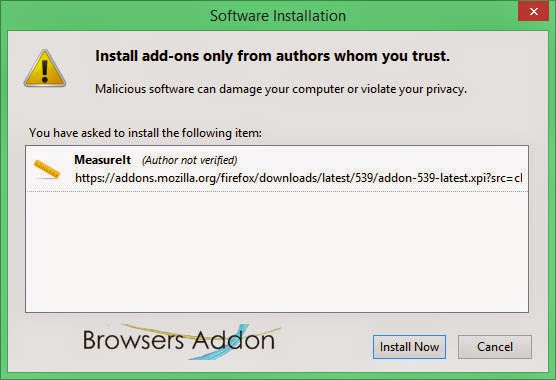
3. MeasureIt installation box pops-up. Click “Install Now” to continue installing add-on, “Cancel” to abort installation.
4. On successful installation, MeasureIt asks user permission to restart the browser. Restart the browser to activate the add-on.
HOW TO: Using MeasureIt on Mozilla Firefox:
1. On successful installation, MeasureIt button should appear at top right side of the browser, to the right side of the URL button. In case it doesn’t show up, click on the “Open menu” (three horizontal bars at top right side of browser) > Customize > and drag the MeasureIt button, or press alt button > View > Toolbars > Customize…, drag the MeasureIt button.
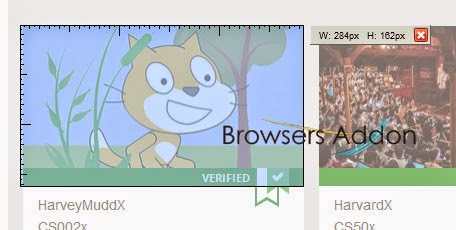
2. Click on the MeasureIt button, move the cursor across the image which you would like to measure, hold the left mouse button and drag across it.
3. To cancel the operation, click on the small “x” or click on the MeasureIt button.
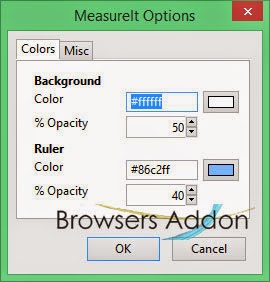
4. To access MeasureIt option, goto Mozilla Firefox’s Add-on Manager, search for “MeasureIt” tab, click on “Options“.
HOW TO: Disable/Remove MeasureIt from Mozilla Firefox:
1. Click on the Firefox, located at left upper corner of the web browser and go to “Add-ons”.
or press “Alt“, Menu bar pops-up, then go to Tools > Add-ons, or you can simply use shortcut key “Ctrl+Shift+A” to access add-on (extension) manger.
2. Now, click on “Disable” to disable the add-on temporarily or click “Remove” to remove the add-on permanently from the browser.
NOTE: Both options require restart for the actions to take effect.
How To Add Restart Button in Mozilla Firefox.
Developer(s): Schuzak
Language support: English
Home page: Shuzak
Difficulty: 
Availability: 
Download: Add to Firefox
HOW TO: Installing Restart on Mozilla Firefox:
1. Go to Restart Mozilla add-on page, or simply click on the above download link and click on “Add to Firefox“.
2. If Mozilla Firefox asks user permission for installation of addon. Click “Allow” to continue installation, leave it to abort.
3. Restart installation box pops-up. Click “Install Now” to continue installing add-on, “Cancel” to abort installation.
4. On successful installation, Restart asks user permission to restart the browser. Restart the browser to activate the add-on.
HOW TO: Using Restart on Mozilla Firefox:
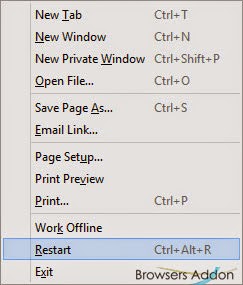
1. By default, you can restart Firefox by “Ctrl”+”Alt”+”R”.
2. To add button, click on “Open Menu“, then click on customize and drag the “Restart” but to the desired location.
3. You can customize the shortcut key by going to Mozilla add-ons manager, find the “Restart” add-on tab and click on the “Options“.
HOW TO: Disable/Remove Restart from Mozilla Firefox:
1. Click on the Firefox, located at left upper corner of the web browser and go to “Add-ons”.
or press “Alt“, Menu bar pops-up, then go to Tools > Add-ons, or you can simply use shortcut key “Ctrl+Shift+A” to access add-on (extension) manger.
2. Now, click on “Disable” to disable the add-on temporarily or click “Remove” to remove the add-on permanently from the browser.
NOTE: Both options require restart for the actions to take effect.
How To: Make Mozilla Firefox Night Friendly with Night Mode Eye Guard.
Love to work in dark surroundings without hurting your eyes too much? Then, Night mode eye guard might be add-on which you should be looking for. The author claims that this add-on works with most of the website(s) but you might run with issues with certain sites.
Developer(s): VHPLab
Language support: English
Home page: Night Mode Eye Guard
Difficulty: 
Availability: 
Download: Add to Firefox
HOW TO: Installing Night Mode Eye Guard on Mozilla Firefox:
1. Go to Night Mode Eye Guard Mozilla add-on page, or simply click on the above download link and click on “Add to Firefox“.
2. If Mozilla Firefox asks user permission for installation of addon. Click “Allow” to continue installation, leave it to abort.
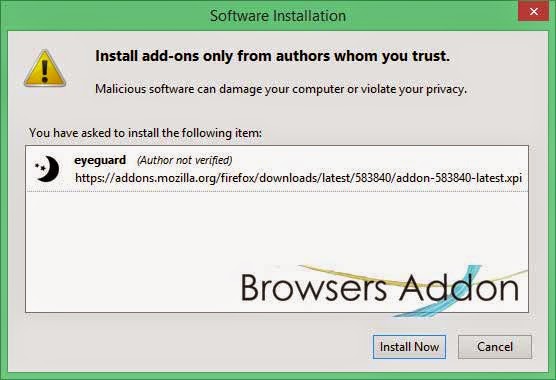
3. Night Mode Eye Guard installation box pops-up. Click “Install Now” to continue installing add-on, “Cancel” to abort installation.
4. On successful installation, you will be notified with the same.
HOW TO: Using Night Mode Eye Guard on Mozilla Firefox:
1. To activate night mode, click on the add-on button which should appear on top right side of the browser.
The difference. As you can see, it’s not that good.
HOW TO: Disable/Remove Night Mode Eye Guard from Mozilla Firefox:
1. Click on the Firefox, located at left upper corner of the web browser and go to “Add-ons”.
or press “Alt“, Menu bar pops-up, then go to Tools > Add-ons, or you can simply use shortcut key “Ctrl+Shift+A” to access add-on (extension) manger.
2. Now, click on “Disable” to disable the add-on temporarily or click “Remove” to remove the add-on permanently from the browser.
NOTE: Both options require restart for the actions to take effect.
Adblock Edge, a Better Alternative to the Popular Adblock Plus?
You can find out how Adblock Edge is different from Adblock Plus here.
Developer(s): Adstomper
Language support: English
Home page: Adstomper
Difficulty: 
Availability: 
Download: Add to Firefox
HOW TO: Installing Adblock Edge on Mozilla Firefox:
1. Go to Adblock Edge Mozilla add-on page, or simply click on the above download link and click on “Add to Firefox“.
2. If Mozilla Firefox asks user permission for installation of addon. Click “Allow” to continue installation, leave it to abort.
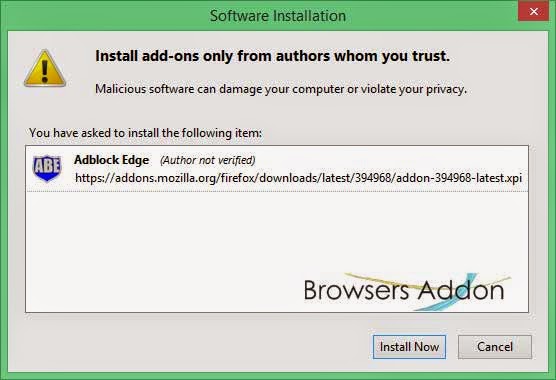
3. Adblock Edge installation box pops-up. Click “Install Now” to continue installing add-on, “Cancel” to abort installation.
4. On successful installation, Adblock Edge doesn’t require restart to activate the add-on.
HOW TO: Using Adblock Edge on Mozilla Firefox:
1. Adblock Edge functions similar to that of Adblock plus, so the feature and usage are also similar.
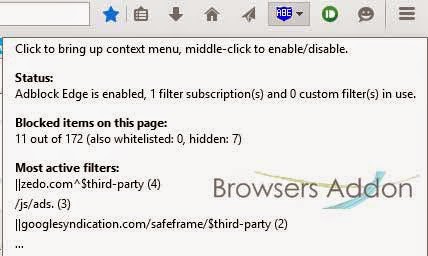
2. Hover the mouse on the Adblock Edge to know the status of the blocking.
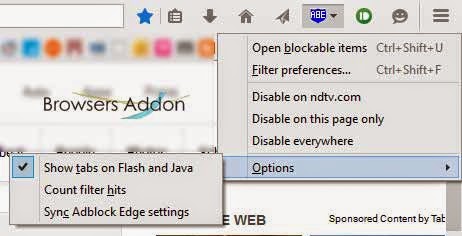
3. Default and custom subscription.
HOW TO: Disable/Remove Adblock Edge from Mozilla Firefox:
1. Click on the Firefox, located at left upper corner of the web browser and go to “Add-ons”.
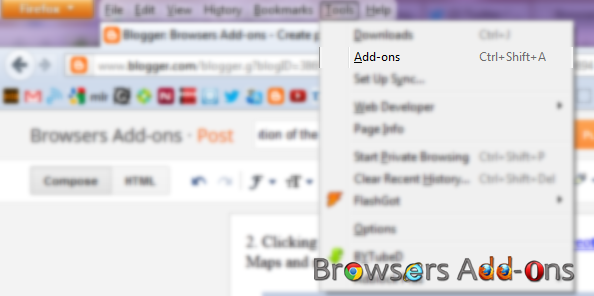
or press “Alt“, Menu bar pops-up, then go to Tools > Add-ons, or you can simply use shortcut key “Ctrl+Shift+A” to access add-on (extension) manger.
2. Search for the Adblock Edge tab, click on “Disable” to disable the add-on temporarily or click “Remove” to remove the add-on permanently from the browser.
NOTE: Both options doesn’t require restart for the actions to take effect.
How To: Convert Text, Links and Images to QRCodes Directly from Web Browser.
Developer(s): Mr Fyda
Language support: English
Home page: QrCodeR
Difficulty: 
Availability: 
Download: Add to Firefox
HOW TO: Installing QrCoderR on Mozilla Firefox:
1. Go to QrCodeR Mozilla add-on page, or simply click on the above download link and click on “Add to Firefox“.
2. If Mozilla Firefox asks user permission for installation of addon. Click “Allow” to continue installation, leave it to abort.
3. QrCoderR installation box pops-up. Click “Install Now” to continue installing add-on, “Cancel” to abort installation.
4. On successful installation, you will be notified. This add-on doesn’t require restart to activate the add-on.
HOW TO: Using QrCoderR on Mozilla Firefox:
1. To create a QRCode, select text/link/image and right click on it and select “Encode xxxx to QrCode“.
2. Boom, QrCode is create, to save it as image, click on it.
3. Verified with phone app.
4. Create the URL QrCode from the address bar.
HOW TO: Disable/Remove QrCodeR from Mozilla Firefox:
1. Click on the Firefox, located at left upper corner of the web browser and go to “Add-ons”.
or press “Alt“, Menu bar pops-up, then go to Tools > Add-ons, or you can simply use shortcut key “Ctrl+Shift+A” to access add-on (extension) manger.
2. Now, search for the QrCodeR tab and click on “Disable” to disable the add-on temporarily or click “Remove” to remove the add-on permanently from the browser.
NOTE: Both options doesn’t require restart for the actions to take effect.
Mozilla Gyan for Privacy and Tips.
As we all know how Mozilla is passionate about users online privacy, it has come up with four easy easy step which it claims you to make smart on privacy.
1. Ask
Mostly asks you whether are you really interested in online privacy and shows study results regarding that.
2. Learn
Tries to educate about privacy, and why privacy matters. It even suggests an add-on which helps you to see who (services) are tracking your browser activities.
3. Act
Suggests you how to take control of your online privacy, which includes Mozilla’s Firefox features like “Do not track” and “Forget button“, and suggest you to use duckduckgo for as default search engine.
Other privacy add-ons.
4. Discuss
Source: Mozilla privacy tips.
How To: Download Tracks From SoundCloud In Firefox With Download Button.
SoundCloud Downloader – Technowise is an add-on for Mozilla Firefox which help its user to download tracks by adding download button. It is really simple and easy to use.
Developer(s): Technowise
Language support: English
Home page: SoundCloud Downloader
License: N/A
Donate: Click Here
Difficulty: 
Availability: 
Download: Add to Firefox
HOW TO: Installing SoundCloud Downloader on Mozilla Firefox:
1. Go to SoundCloud Downloader Mozilla add-on page, or simply click on the above download link and click on “Continue to download” and then “Add to Firefox“.
2. If Mozilla Firefox asks user permission for installation of add-on. Click “Allow” to continue installation, leave it to abort.
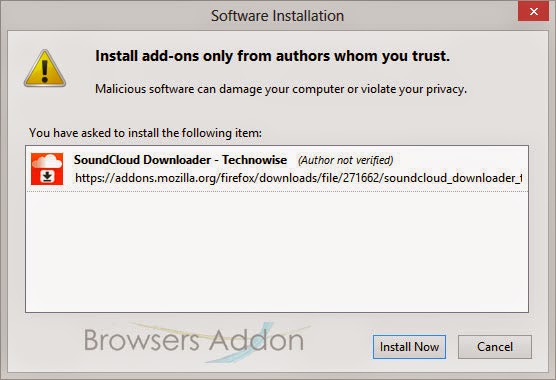
3. SoundCloud Downloader installation box pops-up. Click “Install Now” to continue installing add-on, “Cancel” to abort installation.
HOW TO: Using SoundCloud Downloader on Mozilla Firefox:
1. On successful installation, you will be redirected to SoundCloud Downloader first run page.
2. Before and after installation of the add-on.
3. To access preferences, go to Mozilla Firefox Add-ons Manager, search for “SoundCloud Downloader” tab and click on “Options“.
HOW TO: Disable/Remove SoundCloud Downloader from Mozilla Firefox:
1. Click on the Firefox, located at left upper corner of the web browser and go to “Add-ons”.
or press “Alt“, Menu bar pops-up, then go to Tools > Add-ons, or you can simply use shortcut key “Ctrl+Shift+A” to access add-on (extension) manger.
2. Now, click on “Disable” to disable the add-on temporarily or click “Remove” to remove the add-on permanently from the browser.


