One Click
With Focus 45 Chrome Extension, Try to be Productive on Web.
Focus 45 is an extension for Google Chrome which prevents you from being distracted when working on web. With one click, you can achieve 45 minutes of ZEN mode. In case of necessity, you deactivate for 5 minutes by entering the provided code. It is Promodoro technique on Google Chrome. Other features include, customizable blacklisted sites, changing the length of timer.
Developer(s): Travis Wimer
Language support: English
Home page: Focus 45
Difficulty: 
Availability: ![]()
Download: ADD TO CHROME
HOW TO: Installing Focus 45 on Google Chrome:
1. Go to Chrome web store an search for Focus 45, or simple click on the above download link and click on “FREE (ADD TO CHROME)“.
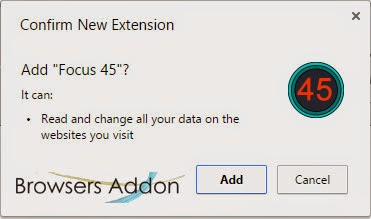
2. Google Chrome asks for user permission to add extension to the web browser. Click on “Add” to install extension to web browsers and “Cancel” to stop the installation process. Chrome also displays, what the extension might access on the web browser.
3. Now, a Focus 45 icon with message pop up appears at upper right corner of browser, indicating that the extension has successfully integrated with the Chrome.
HOW TO: Using Focus 45 on Google Chrome:
1. To initiate the Focus 45, just click (left mouse button) on the Focus 45 icon which is at top right side of the browser. By default, facebook, twitter, YouTube, stumbleupon, reddit, gmail, outlook are block. When you try to access these website, this message is shown.
2. In case you need to access the website, type the give code, the extension gives you five minutes to view the website.
3. To customize the timings, click on the settings.
4. To edit the blacklisted sites, click on the Focus 45 icon which is at top right side of the browser.
HOW TO: Disable/Remove from Google Chrome:
1. Go to Chrome Setting > Tools > Extensions, or simply type “chrome://chrome/extensions/” in URL bar.
2. Now, un-tick the Focus 45 to temporarily disable the extension. Click on the dustbin icon and you will be greeted with pop-up, click “Remove” to remove the extension from Google Chrome.
How To: Convert Text, Links and Images to QRCodes Directly from Web Browser.
Developer(s): Mr Fyda
Language support: English
Home page: QrCodeR
Difficulty: 
Availability: 
Download: Add to Firefox
HOW TO: Installing QrCoderR on Mozilla Firefox:
1. Go to QrCodeR Mozilla add-on page, or simply click on the above download link and click on “Add to Firefox“.
2. If Mozilla Firefox asks user permission for installation of addon. Click “Allow” to continue installation, leave it to abort.
3. QrCoderR installation box pops-up. Click “Install Now” to continue installing add-on, “Cancel” to abort installation.
4. On successful installation, you will be notified. This add-on doesn’t require restart to activate the add-on.
HOW TO: Using QrCoderR on Mozilla Firefox:
1. To create a QRCode, select text/link/image and right click on it and select “Encode xxxx to QrCode“.
2. Boom, QrCode is create, to save it as image, click on it.
3. Verified with phone app.
4. Create the URL QrCode from the address bar.
HOW TO: Disable/Remove QrCodeR from Mozilla Firefox:
1. Click on the Firefox, located at left upper corner of the web browser and go to “Add-ons”.
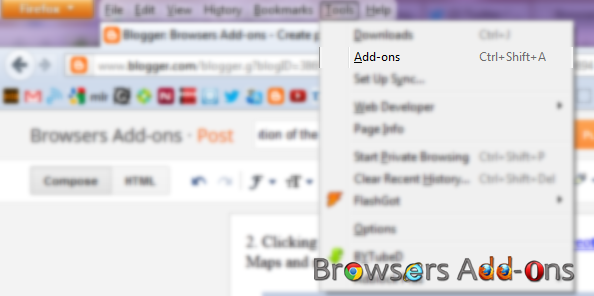
or press “Alt“, Menu bar pops-up, then go to Tools > Add-ons, or you can simply use shortcut key “Ctrl+Shift+A” to access add-on (extension) manger.
2. Now, search for the QrCodeR tab and click on “Disable” to disable the add-on temporarily or click “Remove” to remove the add-on permanently from the browser.
NOTE: Both options doesn’t require restart for the actions to take effect.
Dodge/Bypass/Skip Link Protectors With Desprotetor de Links For Chrome.
Desprotetor de Links is an extension for Google Chrome which lets the user to bypass/dodge or skip the link protectors which usually consume time to reach to the final desired link. With Desprotetor de Links, with one click, you can bypass them all. This extension also claims to bypass famous link protectors (pages that ask the user to sign in a paid service, usually connected to cell phones).
Developer(s): desprotetordelinks
Language support: English and português (Brasil)
Home page: Desprotetor de Links
Support: Click Here
Difficulty: 
Availability: ![]()
Download: Free (ADD TO CHROME)
HOW TO: Installing Desprotetor de Links on Google Chrome:
1. Go to Chrome web store an search for Desprotetor de Links, or simple click on the above download link and click on “FREE (ADD TO CHROME)“.
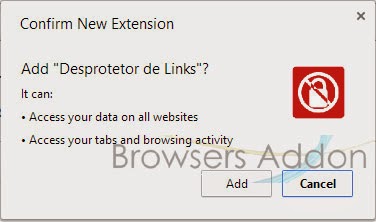
2. Google Chrome asks for user permission to add extension to the web browser. Click on “Add” to install extension to web browsers and “Cancel” to stop the installation process. Chrome also displays, what the extension might access from the web browser.
3. Now, Desprotetor de Links icon with message pop up appears at upper right corner of browser, indicating that the extension has successfully integrated with the Chrome.
HOW TO: Using Desprotetor de Links on Google Chrome:
1. So when ever you encounter link protector, click on the Desprotetor de Links which is located at top right of url (address) bar.
and kaboom, you will be directed to final (protected) page.
2. To access Desprotetor de Links Options (settings), there are two ways, first by right clicking (RMB) on the Desprotetor de Links icon and then click on “Options” and the other way is via Google Extension Manger.
HOW TO: Disable/Remove Desprotetor de Links from Google Chrome:
1. Go to Chrome Setting > Tools > Extensions, or simply type “chrome://chrome/extensions/” in URL bar.
2. Now, un-tick the Desprotetor de Links to temporarily disable the extension. Click on the dustbin icon and you will be greeted with pop-up, click “Remove” to remove the extension from Google Chrome.
Forget Right Click, Here is a Save As Button for Mozilla Firefox.
SaveAS is an add-on for Mozilla Firefox which lets the user to perform the good old function of “Save As…” by just click of a button instead of right-click and “Save As…”. Thought the function of this add-on is quite simple, it may be handy for the those those would like to save webpages, images with just a click on button.
Developer(s): Erkhyann
Language support: English and other languages
Home page: SaveAS
License: MPL v2.0
Difficulty: 
Availability: 
Download: Add to Firefox
HOW TO: Installing SaveAS on Mozilla Firefox:
1. Go to SaveAS Mozilla add-on page, or simply click on the above download link and click on “Add to Firefox“.
2. If Mozilla Firefox asks user permission for installation of addon. Click “Allow” to continue installation, leave it to abort.
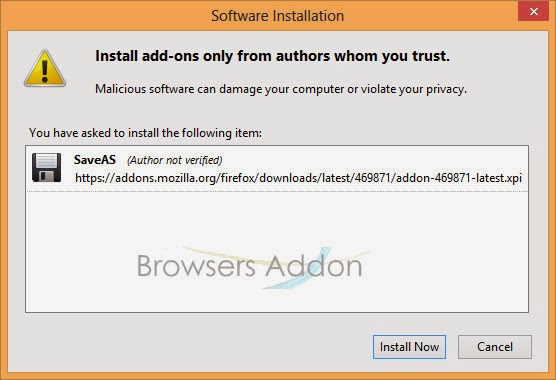
3. SaveAS installation box pops-up. Click “Install Now” to continue installing add-on, “Cancel” to abort installation.
4. On successful installation, SaveAS asks user permission to restart the browser. Restart the browser to activate the add-on.
HOW TO: Using SaveAS on Mozilla Firefox:
1. On successful installation, you will notice SaveAs (Floppy) icon at top right side of the browser.
2. Click on it when ever you like to save the webpage or image currently viewing.
HOW TO: Disable/Remove SaveAS from Mozilla Firefox:
1. Click on the Firefox, located at left upper corner of the web browser and go to “Add-ons”.
or press “Alt“, Menu bar pops-up, then go to Tools > Add-ons, or you can simply use shortcut key “Ctrl+Shift+A” to access add-on (extension) manger.
2. Now, click on “Disable” to disable the add-on temporarily or click “Remove” to remove the add-on permanently from the browser.
NOTE: Both options require restart for the actions to take effect.
Chrome Web Store Launcher for Google Chrome.
Chrome Web Store Launcher is an extension for Google Chrome by Google which lets you access your favorite apps directly from the browser with one click. Apart from accessing your favorite apps, you can ever search the Chrome Store for Apps directly from the browser itself.
Developer(s): Google
Language support: English
Home page: Chrome Web Store Launcher
Difficulty: 
Availability: ![]()
Download: Free (ADD TO CHROME)
HOW TO: Installing Chrome Web Store Launcher on Google Chrome:
1. Go to Chrome web store an search for Chrome Web Store Launcher, or simple click on the above download link and click on “FREE (ADD TO CHROME)“.
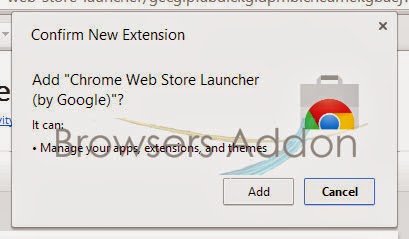
2. Google Chrome asks for user permission to add extension to the web browser. Click on “Add” to install extension to web browsers and “Cancel” to stop the installation process. Chrome also displays, what the extension might access from the web browser.
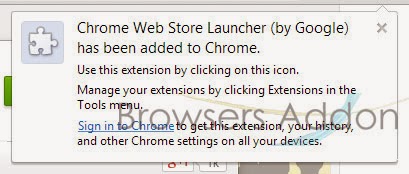
3. Now, Chrome Web Store Launcher with message pop up appears at upper right corner of browser, indicating that the extension has successfully integrated with the Chrome.
HOW TO: Using Chrome Web Store Launcher on Google Chrome:
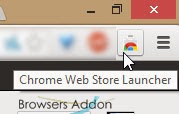
1. After installing the extension, you will notice Chrome Web Store icon to right side of URL bar.
2. Click on it to setup your favorite apps, click on “Select Favorites“.
3. Choose your favorite app.
4. You can use the same pop to search for installed app and to search web store.
HOW TO: Disable/Remove Chrome Web Store Launcher from Google Chrome:
1. Go to Chrome Setting > Tools > Extensions, or simply type “chrome://chrome/extensions/” in URL bar.
2. Now, un-tick the Chrome Web Store Launcher to temporarily disable the extension. Click on the dustbin icon and you will be greeted with pop-up, click “Remove” to remove the extension from Google Chrome.
Switch Proxies with Ease in Mozilla Firefox with Proxy Selector.
Proxy Selector is an add-on developed for Mozilla Firefox by Michele Pezza which helps you switch among proxies with ease. This add-on will prove helpful to those who want to surf anonymously and even view YouTube videos which are country restricted.
Developer(s): Michele Pezza
Language support: English
Home page: Proxy Selector
License: Custom License
Difficulty: 
Availability: 
Download: Add to Firefox
HOW TO: Installing Proxy Selector on Mozilla Firefox:
1. Go to Proxy Selector Mozilla add-on page, or simply click on the above download link and click on “Add to Firefox“.
2. If Mozilla Firefox asks user permission for installation of add-on. Click “Allow” to continue installation, leave it to abort.
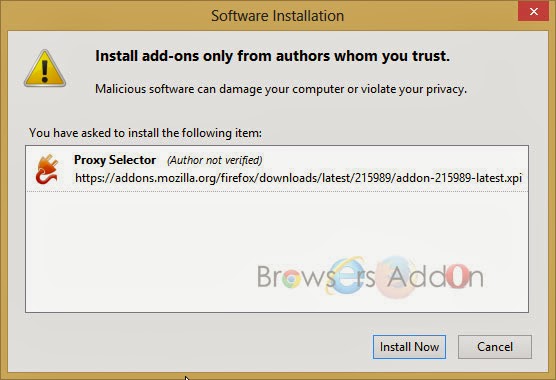
3. Proxy Selector installation box pops-up. Click “Install Now” to continue installing add-on, “Cancel” to abort installation.
4. On successful installation, Proxy Selector asks user permission to restart the browser. Restart the browser to activate the add-on.
HOW TO: Using Proxy Selector on Mozilla Firefox:
1. On successful installation, you will notice Proxy Selector add-on located at right side of Mozilla Firefox URL bar.
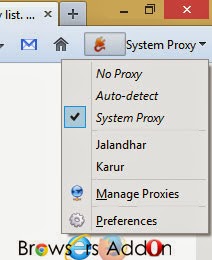
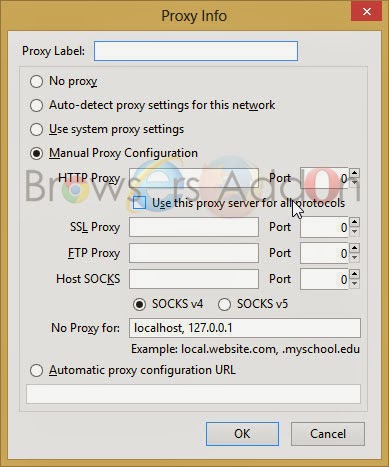
2. Click (LMB) on the Proxy Selector add-on to manage proxies or change preferences.
3. Click on “Add” to add proxies and create your proxies list.
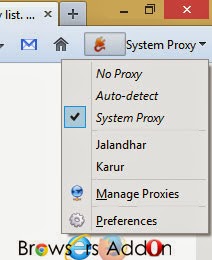
4. To switch proxies, click on the Proxy Selector add-on and click on the desired proxy.
5. To revert back, click on the Proxy Selector add-on and click on the “System Proxy”.
HOW TO: Disable/Remove Proxy Selector from Mozilla Firefox:
1. Click on the Firefox, located at left upper corner of the web browser and go to “Add-ons”.
or press “Alt“, Menu bar pops-up, then go to Tools > Add-ons, or you can simply use shortcut key “Ctrl+Shift+A” to access add-on (extension) manger.
2. Now, click on “Disable” to disable the add-on temporarily or click “Remove” to remove the add-on permanently from the browser.
NOTE: Both options require restart for the actions to take effect.
How to Edit Default Search Engines in Google Chrome with One Click.
Step 1: Right Click on the Chrome URL bar, you can see only one option highlighted (only when the URL bar is empty), Edit search engines …
Step 2: New tab with Chrome Settings pops-up, choose your desired search engines and click on the default. If you don’t find your desired search engine, you can type it and here is procedure for it. Click “Done“.
Now you can notice the change from which Chrome will search from next time.
QuickWiki Helps you Search Words from Wikipedia and Wiktionary Directly from Firefox.
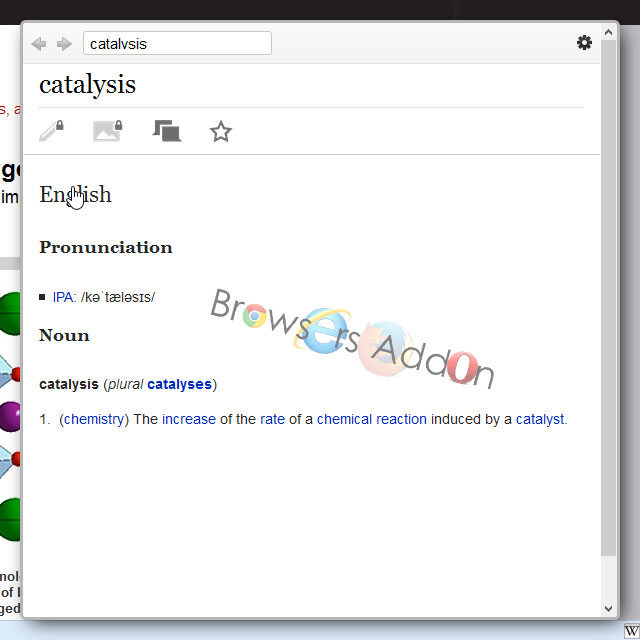
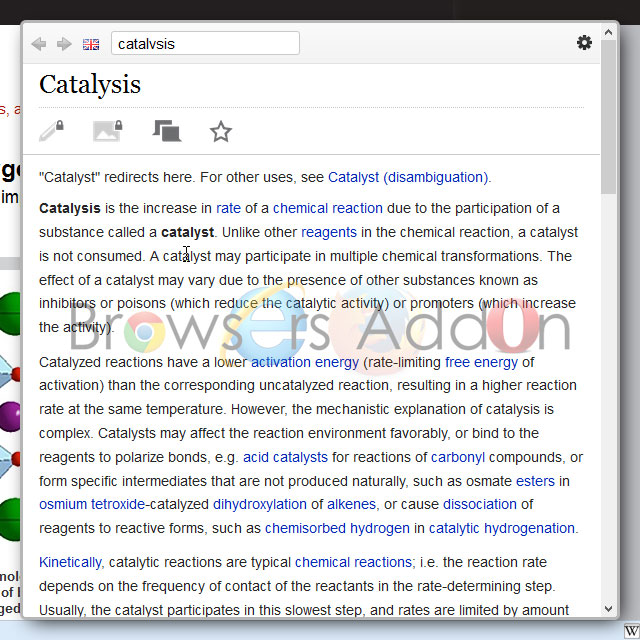
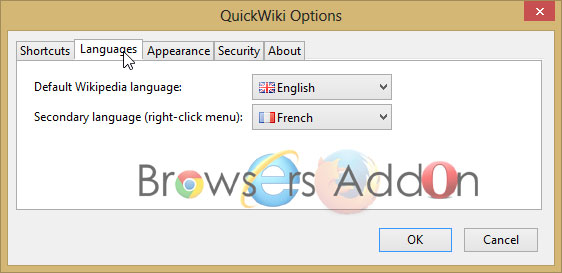
QuickWiki is an add-on for Mozilla Firefox, developed by Rafael de Freitas, which helps you search meanings and articles from Wiktionary directly from Mozilla Firefox browser with one-click without need to open new tab. Apart from English, you can add other language as second language and it supports multiple languages.
Developer(s): Rafael de Freitas
Language support: English and other languages
Home page: QuickWiki
License: GNU GPL License v3.0
Difficulty: 
Availability: 
Download: Add to Firefox
HOW TO: Installing QuickWiki on Mozilla Firefox:
1. Go to QuickWiki Mozilla add-on page, or simply click on the above download link and click on “Add to Firefox“.
2. If Mozilla Firefox asks user permission for installation of addon. Click “Allow” to continue installation, leave it to abort.
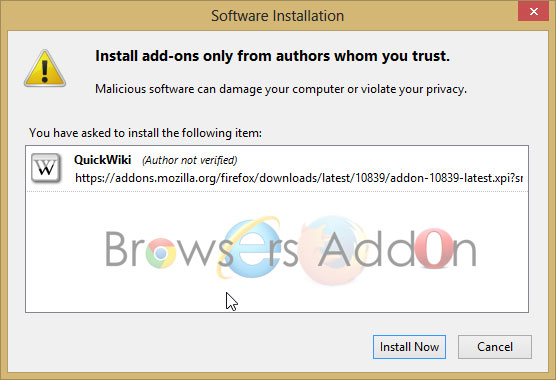
3. QuickWiki installation box pops-up. Click “Install Now” to continue installing add-on, “Cancel” to abort installation.
4. On successful installation, QuickWiki asks user permission to restart the browser. Restart the browser to activate the add-on.
HOW TO: Using QuickWiki on Mozilla Firefox:
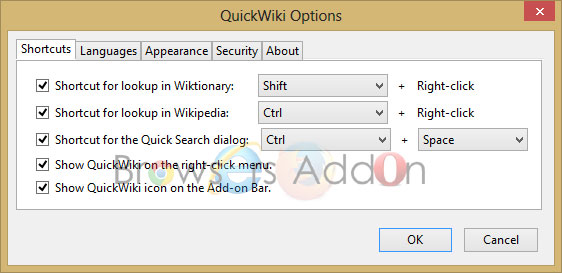
1. Just highlight the word which you would like to search on Wikipedia or Wikitionary, for Wiktionary, hold “Shift” and right click (RMB) on the highlighted text.
For Wikipedia, highlight the text, hold “Ctrl” and right click (RMB) on the highlighted text.
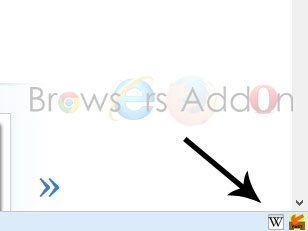
2. To disable QuickWiki, left click (LMB) on the W icon, which is located at bottom right side of Add-ons Bar.
these shortcut keys are by default, and can be changed in Options.
3. To access QuickWiki Options, right click (RMB) on the W icon and choose your preferences.
HOW TO: Disable/Remove QuickWiki from Mozilla Firefox:
1. Click on the Firefox, located at left upper corner of the web browser and go to “Add-ons”.
or press “Alt“, Menu bar pops-up, then go to Tools > Add-ons, or you can simply use shortcut key “Ctrl+Shift+A” to access add-on (extension) manger.
2. Now, click on “Disable” to disable the add-on temporarily or click “Remove” to remove the add-on permanently from the browser.
NOTE: Both options require restart for the actions to take effect.

