Security
How to Bypass Geo-blocking to Access Content with Firefox Extension for Free.
ProxMate is add-on which lets its user bypass the geo-location based restriction to access your favorite content or service(s). ProxMate is available for all the popular browsers like Google Chrome, Mozilla Firefox and Opera.
Why you should use Proxmate (according to author)?
- Faster – Claims to be faster than VPN.
- Pluggable – ProxMate allows you to pick exact package of the service(s) which you would like to access.
- Secure – SSL will stay SSL.
- Open Source – No more secrets.
- Support.
Developer(s): Personalitycores.
Language support: English
Home page: ProxMate
Difficulty: 
Availability: 
![]()

Download: Add to Firefox
HOW TO: Installing ProxMate on Mozilla Firefox:
1. Go to ProxMate Mozilla add-on page, or simply click on the above download link and click on “Add to Firefox“.
2. If Mozilla Firefox asks user permission for installation of addon. Click “Allow” to continue installation, leave it to abort.
3. ProxMate installation box pops-up. Click “Install Now” to continue installing add-on, “Cancel” to abort installation.
4. On successful installation, ProxMate doesn’t require restart to activate the add-on.
HOW TO: Using ProxMate on Mozilla Firefox:
1. On successful installation, you will notice ProxMate button at top right side of the browser, next to Mozilla’s “Open menu“.
2. Click on it to install the package(s). You need to install specific package to bypass specific service restriction. For sake of testing, I tried Vevo.
3. Before and after installing the ProxMate’s Vevo package.
HOW TO: Disable/Remove ProxMate from Mozilla Firefox:
1. Click on the Firefox, located at left upper corner of the web browser and go to “Add-ons”.
or press “Alt“, Menu bar pops-up, then go to Tools > Add-ons, or you can simply use shortcut key “Ctrl+Shift+A” to access add-on (extension) manger.
2. Now, click on “Disable” to disable the add-on temporarily or click “Remove” to remove the add-on permanently from the browser.
NOTE: Both options doesn’t require restart for the actions to take effect.
Browse Internet with Premium and Secure Incognito Mode with Spotflux Lite.
Spotflux Lite is an extension for Google Chrome which encrypts your web browsing and gives you privacy and security. Spotflux encryption is done via SSL, hides your IP address. With this extension, you will have free VPN within Chrome browser. Spotflux claims to protect against anti-malware, anti-phishing protection as well as SPDY content acceleration.
Developer(s): Spotflux
Language support: English
Home page: Spotflux
Difficulty: 
Availability: ![]()
Download: ADD TO CHROME
HOW TO: Installing Spotflux Lite on Google Chrome:
1. Go to Chrome web store an search for Spotflux Lite, or simple click on the above download link and click on “FREE (ADD TO CHROME)“.
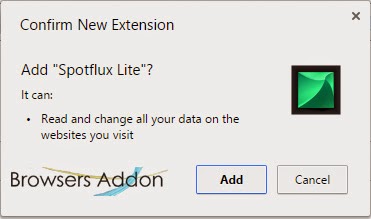
2. Google Chrome asks for user permission to add extension to the web browser. Click on “Add” to install extension to web browsers and “Cancel” to stop the installation process. Chrome also displays, what the extension might access on the web browser.
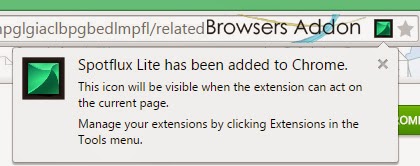
3. Now, a Spotflux Lite icon with message pop up appears at upper right corner of browser, indicating that the extension has successfully integrated with the Chrome.
HOW TO: Using Spotflux Lite on Google Chrome:
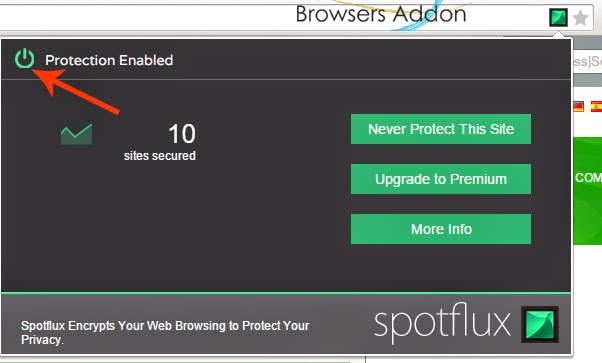
1. On installation, by default, Spotflux gets active, you can know this by noticing Spotflux icon with URL(address) bar.
2. To disable Spotflux Lite protection, click on the Spotflux Lite icon which is within URL bar, Spotflux Lite pops-up, click on the power icon to disable.
3. To enjoy more and customized features, you need to upgrade to premium.
HOW TO: Disable/Remove Spotflux Lite from Google Chrome:
1. Go to Chrome Setting > Tools > Extensions, or simply type “chrome://chrome/extensions/” in URL bar.
2. Now, un-tick the Spotflux Lite to temporarily disable the extension. Click on the dustbin icon and you will be greeted with pop-up, click “Remove” to remove the extension from Google Chrome.
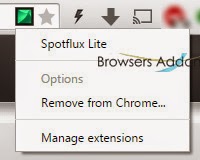
or you can remove directly from URL bar by right clicking the Spotflux Lite icon.
Save Yourselves from Landing into Infected Sites with Dr.Web Anti-Virus Link Checker.
Suspicious of links which you need to open? Then, Dr.Web Anti-Virus Link Checker maybe helpful for you. Dr.Web online anti-virus is a free extension for Google Chrome which can scan instantly webpages and files downloaded from internet. It even blocks websites attempt to monitor users activity and protects from virus attacks, phishing attempts and ads too.
Developer(s): Doctor Web. Ltd.
Language support: English, русский
Home page: Dr. Web
Difficulty: 
Availability: ![]()
Download: ADD TO CHROME
HOW TO: Installing Dr.Web Anti-Virus Link Checker on Google Chrome:
1. Go to Chrome web store an search for Dr,Web Anti-Virus Link Checker, or simple click on the above download link and click on “FREE (ADD TO CHROME)“.
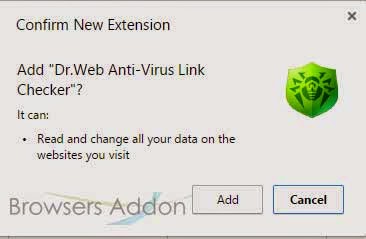
2. Google Chrome asks for user permission to add extension to the web browser. Click on “Add” to install extension to web browsers and “Cancel” to stop the installation process. Chrome also displays, what the extension might access on the web browser.
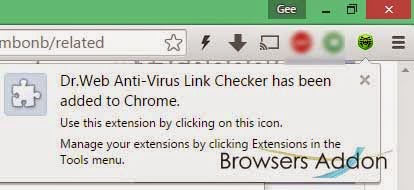
3. Now, Dr.Web icon with message pop up appears at upper right corner of browser, indicating that the extension has successfully integrated with the Chrome.
HOW TO: Using Dr.Web Anti-Virus Link Checker on Google Chrome:
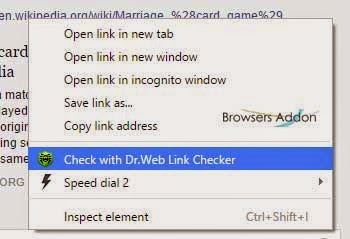
1. To check the link, right click on the link and select “Check with Dr.Web“.
after scanning, you will be provided with the report similar to the image below.
2. To check out setting and stats of Dr.Web, click on the Dr.Web icon located at top right side of the browser.
HOW TO: Disable/Remove Dr.Web Anti-Virus Link Checker from Google Chrome:
1. Go to Chrome Setting > Tools > Extensions, or simply type “chrome://chrome/extensions/” in URL bar.
2. Now, un-tick the Dr.Web to temporarily disable the extension. Click on the dustbin icon and you will be greeted with pop-up, click “Remove” to remove the extension from Google Chrome.
DotVPN, Get Free VPN Access With Its Chrome Extension.
DotVPN is an extension for Google Chrome which claims to provide secure and free VPN access. With DotVPN, you can use USA, Germany, Japan, Singapore, Russia, Nederland, UK, France and Sweden as your virtual locations. Click here to look out at claimed benefits.
Developer(s): DotVPN
Language support: English and русский
Home page: DotVPN
Support: Click Here
Difficulty: 
Availability: ![]()
Download: Free (ADD TO CHROME)
HOW TO: Installing DotVPN on Google Chrome:
1. Go to Chrome web store an search for DotVPN, or simple click on the above download link and click on “FREE (ADD TO CHROME)“.
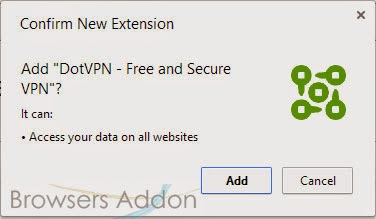
2. Google Chrome asks for user permission to add extension to the web browser. Click on “Add” to install extension to web browsers and “Cancel” to stop the installation process. Chrome also displays, what the extension might access from the web browser.
3. Now, DotVPN icon with message pop up appears at upper right corner of browser, indicating that the extension has successfully integrated with the Chrome.
HOW TO: Using DotVPN on Google Chrome:
1. After installing the extension, you need to sign-up with DotVPN to initiate VPN connection.
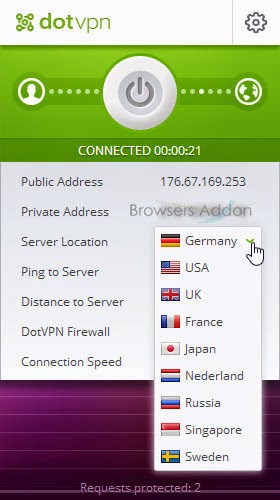
2. You can change virtual location by changing the Server location.
3. To terminate or pause the VPN connection, click on the power button.
and it works ……
Japan as virtual location.
Sweden as virtual location.
USA as virtual location.
HOW TO: Disable/Remove DotVPN from Google Chrome:
1. Go to Chrome Setting > Tools > Extensions, or simply type “chrome://chrome/extensions/” in URL bar.
2. Now, un-tick the DotVPN to temporarily disable the extension. Click on the dustbin icon and you will be greeted with pop-up, click “Remove” to remove the extension from Google Chrome.
Dodge/Bypass/Skip Link Protectors With Desprotetor de Links For Chrome.
Desprotetor de Links is an extension for Google Chrome which lets the user to bypass/dodge or skip the link protectors which usually consume time to reach to the final desired link. With Desprotetor de Links, with one click, you can bypass them all. This extension also claims to bypass famous link protectors (pages that ask the user to sign in a paid service, usually connected to cell phones).
Developer(s): desprotetordelinks
Language support: English and português (Brasil)
Home page: Desprotetor de Links
Support: Click Here
Difficulty: 
Availability: ![]()
Download: Free (ADD TO CHROME)
HOW TO: Installing Desprotetor de Links on Google Chrome:
1. Go to Chrome web store an search for Desprotetor de Links, or simple click on the above download link and click on “FREE (ADD TO CHROME)“.
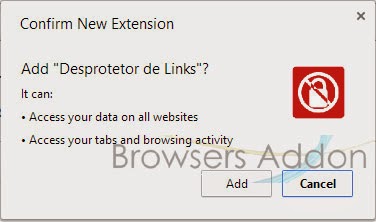
2. Google Chrome asks for user permission to add extension to the web browser. Click on “Add” to install extension to web browsers and “Cancel” to stop the installation process. Chrome also displays, what the extension might access from the web browser.
3. Now, Desprotetor de Links icon with message pop up appears at upper right corner of browser, indicating that the extension has successfully integrated with the Chrome.
HOW TO: Using Desprotetor de Links on Google Chrome:
1. So when ever you encounter link protector, click on the Desprotetor de Links which is located at top right of url (address) bar.
and kaboom, you will be directed to final (protected) page.
2. To access Desprotetor de Links Options (settings), there are two ways, first by right clicking (RMB) on the Desprotetor de Links icon and then click on “Options” and the other way is via Google Extension Manger.
HOW TO: Disable/Remove Desprotetor de Links from Google Chrome:
1. Go to Chrome Setting > Tools > Extensions, or simply type “chrome://chrome/extensions/” in URL bar.
2. Now, un-tick the Desprotetor de Links to temporarily disable the extension. Click on the dustbin icon and you will be greeted with pop-up, click “Remove” to remove the extension from Google Chrome.
Indian Cyber Security Agency (CERT-IN) Issues Advisory To Upgrade Firefox and Chrome To Its Latest Version.
In it’s latest advisory, CERT-IN said, “Multiple vulnerabilities have been reported in Mozilla Firefox, Thunderbird and SeaMonkey which could be exploited by a remote attacker to bypass certain security restrictions, disclose potentially sensitive information, gain escalated privileges, execute arbitrary code and causes denial of service condition on the affected system”.
The agency, in its advisory, said the vulnerability is caused “due to improper restrict access to ‘about:home’ buttons by script on other pages in Mozilla Firefox”.
“A user-assisted remote attacker could exploit this vulnerability using a crafted website or webpage. Successful exploitation of this vulnerability could allow user-assisted remote attacker to cause a denial of service condition,” the CERT-In said.
Source: CIAD-2014-006 and -007
Via: TOI
Clear Console, an Extension to Clear Background Data from Mozilla Firefox with One Click.
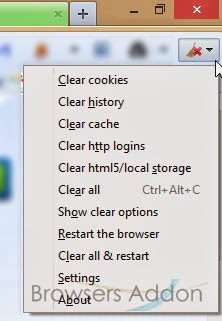
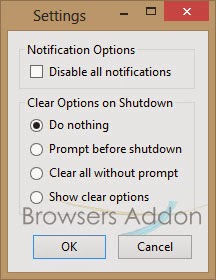
Clear Console is an add-on for Mozilla Firefox developed by QBurst which clears cache, cookies, history, logins and local storage with one click. On clearing, you can get notification or not, depends on preference.
Developer(s): Rejah Rehim A A, Sreenath Sasikumar, QBurst
Language support: English.
Home page: Clear Console
License: MPL v1.1
Difficulty: 
Availability: 
Download: Add to Firefox
HOW TO: Installing Clear Console on Mozilla Firefox:
1. Go to Clear Console Mozilla add-on page, or simply click on the above download link and click on “Add to Firefox“.
2. If Mozilla Firefox asks user permission for installation of add-on. Click “Allow” to continue installation, leave it to abort.
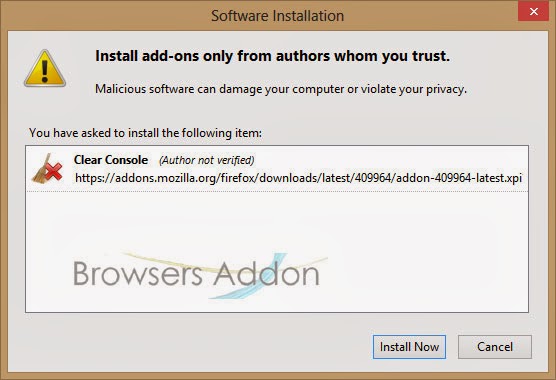
3. Clear Console installation box pops-up. Click “Install Now” to continue installing add-on, “Cancel” to abort installation.
4. On successful installation, Clear Console asks user permission to restart the browser. Restart the browser to activate the add-on.
HOW TO: Using Clear Console on Mozilla Firefox:
1. On successful installation, you will notice Clear Console icon to top right side of the Firefox.
2. To access preferences, you can click on “Settings” or go to Mozilla Firefox Add-ons Manager, search for “Clear Console” tab and click on “Options“.
HOW TO: Disable/Remove Clear Console from Mozilla Firefox:
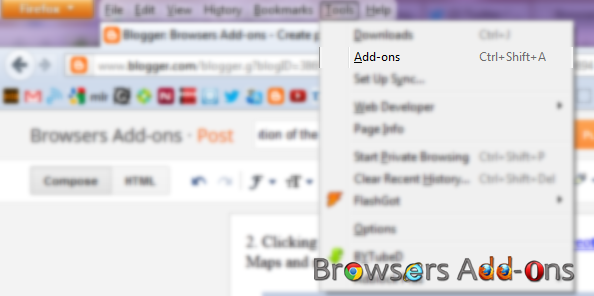
1. Click on the Firefox, located at left upper corner of the web browser and go to “Add-ons”.
or press “Alt“, Menu bar pops-up, then go to Tools > Add-ons, or you can simply use shortcut key “Ctrl+Shift+A” to access add-on (extension) manger.
2. Now, click on “Disable” to disable the add-on temporarily or click “Remove” to remove the add-on permanently from the browser.
NOTE: Both options require restart for the actions to take effect.
Switch to HTTPs version by Default with HTTPS Everywhere Extension for Google Chrome.
Developer(s): EFF and Tor
Language support: English and español.
Home page: EFF
Support: Click Here
Difficulty:

Availability:

Download: Free (ADD TO CHROME)
HOW TO: Installing HTTPS Everywhere on Google Chrome:
1. Go to Chrome web store an search for HTTPS Everywhere, or simple click on the above download link and click on “FREE (ADD TO CHROME)“.
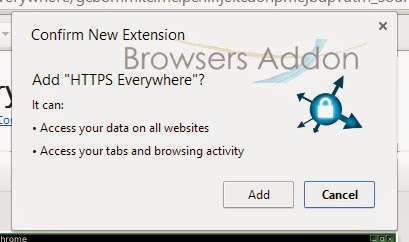
2. Google Chrome asks for user permission to add extension to the web browser. Click on “Add” to install extension to web browsers and “Cancel” to stop the installation process. Chrome also displays, what the extension might access from the web browser.
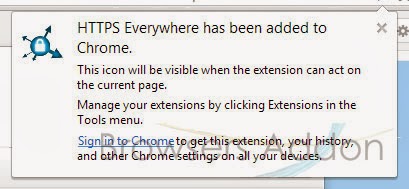
3. Now, HTTPS Everywhere with message pop up appears at upper right corner of browser, indicating that the extension has successfully integrated with the Chrome.
HOW TO: Using HTTPS Everywhere on Google Chrome:
1. On successful installation, you will notice https instead of http in the URL bar, if the site supports it.
HOW TO: Disable/Remove HTTPS Everywhere from Google Chrome:
1. Go to Chrome Setting > Tools > Extensions, or simply type “chrome://chrome/extensions/” in URL bar.
2. Now, un-tick the HTTPS Everywhere to temporarily disable the extension. Click on the dustbin icon and you will be greeted with pop-up, click “Remove” to remove the extension from Google Chrome.
Block Ads and Adware Intruding your Opera Browsers with Adguard.
Adgurd is an extension for Opera which blocks all types of advertisement like banners, pop-up, video ads, sponsored links etc., The best part of this extension is that it supports whitelist, multi language filters and you can create a rule for yourself. It also claims to provide protection against phishing and malware. Your get some extra features and premium protection with paid plan.
Developer(s): AdGurad
Language support: English and русский
Home page: AdGuard
Difficulty: 
Support: Help Center
Availability: 

![]()

Download: Add to Opera
HOW TO: Installing Adguard on Opera:
1. Go to Adguard Opera add-ons page, or simply click on the above download link and click on “Add to Opera“.
2. On successful installation, “+ Add to Opera” turns to “ ” and you will be directed to First Run / Preference page.
HOW TO: Using Adguard on Opera:
1. On successful installation, you will directed to Adguard welcome page and you can notice the disappearance of ADS when you start browsing normally.
With Adguard OFF:
With AdGuard ON:
2. You can even notice the number of items blocked.
3. To access Adguard Options (preferences), right click on the Adguard extension to access options.
HOW TO: Disable/Remove Adguard on Opera:
1. To Disable/Remove this extension, click (LMB) on the Opera which at top left side of the browsers or press “Ctrl”+”Shift”+”E” to go to Opera’s Extension.
2. Search for desired tab, click on “Disable” to disable and “X” to remove the extension from the opera browser.
Mozilla unveils Minion, an Open Source Security Testing Platform.
Today, Mozilla has introduced Minion, a security testing platform to be used by developers and security experts with a purpose of minimizing their work. Mozilla claims that Minion takes a different approach to automated web security testing by focusing on correct and actionable results that don’t requires security experts to validate, unlike it counter parts which generally generate huge amount of data which is very difficult for analyzing.
Since this platform is open source, Mozilla expects user participation, regardless of security experts to use Minion to increase the security of their application and thus, making the web a better palace.
Source: Mozilla Blog


