Productivity
How To: Measure the Pixel Size Right Away from the Firefox Browser.
Developer(s): Kevin Freitas
Language support: English
Home page: MeasureIt
License: N/a
Donate: Click here
Difficulty: 
Availability: 
Download: Add to Firefox
HOW TO: Installing MeasureIt on Mozilla Firefox:
1. Go to MeasureIt Mozilla add-on page, or simply click on the above download link and click on “Add to Firefox“.
2. If Mozilla Firefox asks user permission for installation of addon. Click “Allow” to continue installation, leave it to abort.
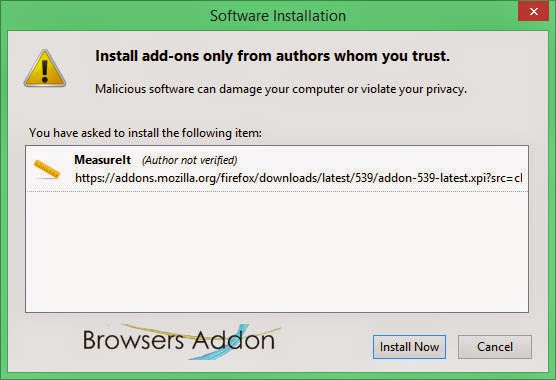
3. MeasureIt installation box pops-up. Click “Install Now” to continue installing add-on, “Cancel” to abort installation.
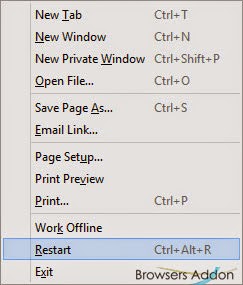
4. On successful installation, MeasureIt asks user permission to restart the browser. Restart the browser to activate the add-on.
HOW TO: Using MeasureIt on Mozilla Firefox:
1. On successful installation, MeasureIt button should appear at top right side of the browser, to the right side of the URL button. In case it doesn’t show up, click on the “Open menu” (three horizontal bars at top right side of browser) > Customize > and drag the MeasureIt button, or press alt button > View > Toolbars > Customize…, drag the MeasureIt button.
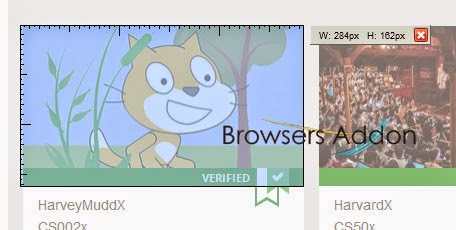
2. Click on the MeasureIt button, move the cursor across the image which you would like to measure, hold the left mouse button and drag across it.
3. To cancel the operation, click on the small “x” or click on the MeasureIt button.
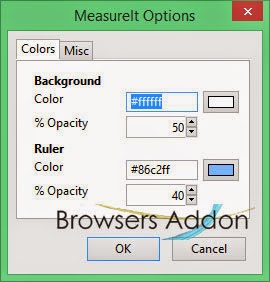
4. To access MeasureIt option, goto Mozilla Firefox’s Add-on Manager, search for “MeasureIt” tab, click on “Options“.
HOW TO: Disable/Remove MeasureIt from Mozilla Firefox:
1. Click on the Firefox, located at left upper corner of the web browser and go to “Add-ons”.
or press “Alt“, Menu bar pops-up, then go to Tools > Add-ons, or you can simply use shortcut key “Ctrl+Shift+A” to access add-on (extension) manger.
2. Now, click on “Disable” to disable the add-on temporarily or click “Remove” to remove the add-on permanently from the browser.
NOTE: Both options require restart for the actions to take effect.
How To Add Restart Button in Mozilla Firefox.
Developer(s): Schuzak
Language support: English
Home page: Shuzak
Difficulty: 
Availability: 
Download: Add to Firefox
HOW TO: Installing Restart on Mozilla Firefox:
1. Go to Restart Mozilla add-on page, or simply click on the above download link and click on “Add to Firefox“.
2. If Mozilla Firefox asks user permission for installation of addon. Click “Allow” to continue installation, leave it to abort.
3. Restart installation box pops-up. Click “Install Now” to continue installing add-on, “Cancel” to abort installation.
4. On successful installation, Restart asks user permission to restart the browser. Restart the browser to activate the add-on.
HOW TO: Using Restart on Mozilla Firefox:
1. By default, you can restart Firefox by “Ctrl”+”Alt”+”R”.
2. To add button, click on “Open Menu“, then click on customize and drag the “Restart” but to the desired location.
3. You can customize the shortcut key by going to Mozilla add-ons manager, find the “Restart” add-on tab and click on the “Options“.
HOW TO: Disable/Remove Restart from Mozilla Firefox:
1. Click on the Firefox, located at left upper corner of the web browser and go to “Add-ons”.
or press “Alt“, Menu bar pops-up, then go to Tools > Add-ons, or you can simply use shortcut key “Ctrl+Shift+A” to access add-on (extension) manger.
2. Now, click on “Disable” to disable the add-on temporarily or click “Remove” to remove the add-on permanently from the browser.
NOTE: Both options require restart for the actions to take effect.
With Focus 45 Chrome Extension, Try to be Productive on Web.
Focus 45 is an extension for Google Chrome which prevents you from being distracted when working on web. With one click, you can achieve 45 minutes of ZEN mode. In case of necessity, you deactivate for 5 minutes by entering the provided code. It is Promodoro technique on Google Chrome. Other features include, customizable blacklisted sites, changing the length of timer.
Developer(s): Travis Wimer
Language support: English
Home page: Focus 45
Difficulty: 
Availability: ![]()
Download: ADD TO CHROME
HOW TO: Installing Focus 45 on Google Chrome:
1. Go to Chrome web store an search for Focus 45, or simple click on the above download link and click on “FREE (ADD TO CHROME)“.
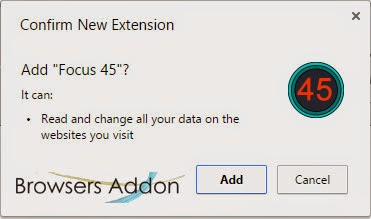
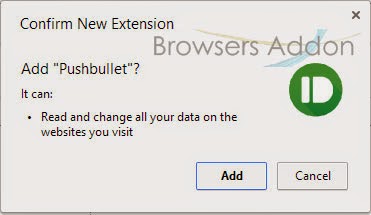
2. Google Chrome asks for user permission to add extension to the web browser. Click on “Add” to install extension to web browsers and “Cancel” to stop the installation process. Chrome also displays, what the extension might access on the web browser.
3. Now, a Focus 45 icon with message pop up appears at upper right corner of browser, indicating that the extension has successfully integrated with the Chrome.
HOW TO: Using Focus 45 on Google Chrome:
1. To initiate the Focus 45, just click (left mouse button) on the Focus 45 icon which is at top right side of the browser. By default, facebook, twitter, YouTube, stumbleupon, reddit, gmail, outlook are block. When you try to access these website, this message is shown.
2. In case you need to access the website, type the give code, the extension gives you five minutes to view the website.
3. To customize the timings, click on the settings.
4. To edit the blacklisted sites, click on the Focus 45 icon which is at top right side of the browser.
HOW TO: Disable/Remove from Google Chrome:
1. Go to Chrome Setting > Tools > Extensions, or simply type “chrome://chrome/extensions/” in URL bar.
2. Now, un-tick the Focus 45 to temporarily disable the extension. Click on the dustbin icon and you will be greeted with pop-up, click “Remove” to remove the extension from Google Chrome.
How To Restrict and Control the Amount of Time You Visit a Website.
StayFocusd is an extension for Google Chrome which helps to increase your productivity by limiting/restricting the amount of time you spend on your favorite website. Let’s find out how can we really do it.
Developer(s): Transfusion Media
Language support: English
Home page: StayFocused
Difficulty: 
Availability: ![]()
Download: ADD TO CHROME
HOW TO: Installing StayFocusd on Google Chrome:
1. Go to Chrome web store an search for StayFocusd, or simple click on the above download link and click on “FREE (ADD TO CHROME)“.
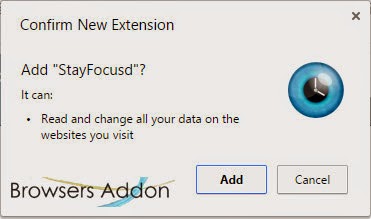
2. Google Chrome asks for user permission to add extension to the web browser. Click on “Add” to install extension to web browsers and “Cancel” to stop the installation process. Chrome also displays, what the extension might access on the web browser.
3. Now, a StayFocusd icon with message pop up appears at upper right corner of browser, indicating that the extension has successfully integrated with the Chrome.
HOW TO: Using StayFocusd on Google Chrome:
1. To restrict a site, open that website and click of StayFocusd icon at top right of the browser. Click on the “Block this entire site“. By default, StayFocusd give you grace time of 10 minutes to access the site. To change and explore more settings, click on “Settings” below the “Block the entire site“
2. The interesting feature is the “Nuclear Option“. On activation, it will block sites for the number of hours which you set, independent of your active days or active hours. Once activated, there is no way to cancel it.
HOW TO: Disable/Remove StayFocusd from Google Chrome:
1. Go to Chrome Setting > Tools > Extensions, or simply type “chrome://chrome/extensions/” in URL bar.
2. Now, un-tick the StayFocusd to temporarily disable the extension. Click on the dustbin icon and you will be greeted with pop-up, click “Remove” to remove the extension from Google Chrome.
Viewing YouTube Smartly on Google Chrome with Add-on.
Loving multitasking and don’t want to miss a bit of video playing on YouTube? Then, Smart Pause for YouTube extension for Google Chrome might be some use for you. Smart Pause for YouTube automatically pauses current playing video on YouTube when leave the page and resumes when you are back. Sounds cool?? Try it.
Developer(s): Fvd Media
Language support: English
Home page: Smart Pause for YouTube
Difficulty: 
Availability: ![]()
Download: ADD TO CHROME
HOW TO: Installing Smart Pause for YouTube on Google Chrome:
1. Go to Chrome web store an search for Smart Pause for YouTube, or simple click on the above download link and click on “FREE (ADD TO CHROME)“.
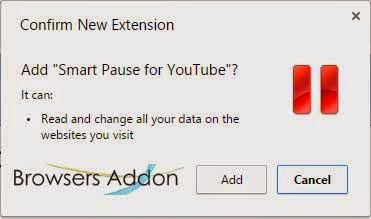
2. Google Chrome asks for user permission to add extension to the web browser. Click on “Add” to install extension to web browsers and “Cancel” to stop the installation process. Chrome also displays, what the extension might access on the web browser.
3. Now, a Smart Pause for YouTube icon with message pop up appears at upper right corner of browser, indicating that the extension has successfully integrated with the Chrome.
HOW TO: Using on Smart Pause for YouTube Google Chrome:
1. After successful installation of Smart Pause for YouTube extension you will be redirected to Fvd page showcasing their other products.
2. By default, Smart Pause for YouTube is activated on YouTube page, the pause logo side of “Likes” and “Dislikes” shows that the extension has been successfully integrated into YouTube.
3. To disable Smart Pause for YouTube temporarily, click on the pause logo, it will turn from red to gray. To explore more options, hover the mouse over pause logo for the option (gear) icon to appear.
HOW TO: Disable/Remove from Google Chrome:
1. Go to Chrome Setting > Tools > Extensions, or simply type “chrome://chrome/extensions/” in URL bar.
2. Now, un-tick the Smart Pause for YouTube to temporarily disable the extension. Click on the dustbin icon and you will be greeted with pop-up, click “Remove” to remove the extension from Google Chrome.
How To: Convert Text, Links and Images to QRCodes Directly from Web Browser.
Developer(s): Mr Fyda
Language support: English
Home page: QrCodeR
Difficulty: 
Availability: 
Download: Add to Firefox
HOW TO: Installing QrCoderR on Mozilla Firefox:
1. Go to QrCodeR Mozilla add-on page, or simply click on the above download link and click on “Add to Firefox“.
2. If Mozilla Firefox asks user permission for installation of addon. Click “Allow” to continue installation, leave it to abort.
3. QrCoderR installation box pops-up. Click “Install Now” to continue installing add-on, “Cancel” to abort installation.
4. On successful installation, you will be notified. This add-on doesn’t require restart to activate the add-on.
HOW TO: Using QrCoderR on Mozilla Firefox:
1. To create a QRCode, select text/link/image and right click on it and select “Encode xxxx to QrCode“.
2. Boom, QrCode is create, to save it as image, click on it.
3. Verified with phone app.
4. Create the URL QrCode from the address bar.
HOW TO: Disable/Remove QrCodeR from Mozilla Firefox:
1. Click on the Firefox, located at left upper corner of the web browser and go to “Add-ons”.
or press “Alt“, Menu bar pops-up, then go to Tools > Add-ons, or you can simply use shortcut key “Ctrl+Shift+A” to access add-on (extension) manger.
2. Now, search for the QrCodeR tab and click on “Disable” to disable the add-on temporarily or click “Remove” to remove the add-on permanently from the browser.
NOTE: Both options doesn’t require restart for the actions to take effect.
How To: Run Android Application on Desktop Using Google Chrome.
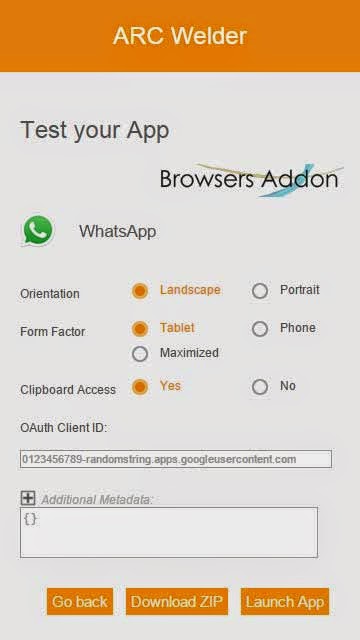
App Runtime for Chrome (ARC) Welder is a tool (app) for Google Chrome which lets you to test and publish Android apps to Chrome OS using the App Runtime for Chrome (beta). This mean you can install your favorite Android apps on your beloved Chrome browser.
Developer(s): arc-eng
Language support: English
Home page: ARC Welder
Difficulty: 

Availability: ![]()
Download: ADD TO CHROME
HOW TO: Installing ARC Welder on Google Chrome:
1. Go to Chrome web store an search for ARC Welder, or simple click on the above download link and click on “FREE (ADD TO CHROME)“.
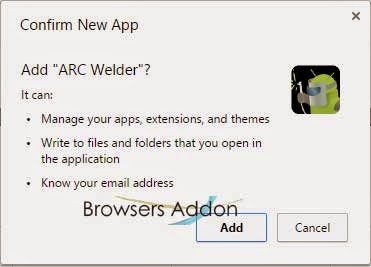
2. Google Chrome asks for user permission to add extension to the web browser. Click on “Add” to install extension to web browsers and “Cancel” to stop the installation process. Chrome also displays, what the extension might access on the web browser.
3. It is ~12 MB file, therefore some patience is required for its installation. After that you will be notified.
HOW TO: Using ARC Welder on Google Chrome:
1. After successful installation of ARC Welder, you will be redirected to Chrome App Launcher page, or if you are still in chrome web store ARC Welder page, you can launch the app from there itself.
2. On launching the app, you will be greeted with following ….
3. After selecting the desired directory where you want to store the apps and its data, proceed to add android apk.
3. It is desired to choose Orientation > Landscape and Form Factor > Tablet and click on “Launch App“.
HOW TO: Disable/Remove from Google Chrome:
1. Go to Chrome Setting > Tools > Extensions, or simply type “chrome://chrome/extensions/” in URL bar.
2. Now, un-tick the ARC Welder to temporarily disable the extension. Click on the dustbin icon and you will be greeted with pop-up, click “Remove” to remove the extension from Google Chrome.
NOTE: This is a Chrome app, not an extension (add-on).
Block Notorious Pop-Ups From Your Favorite Site With Poper Blocker For Chrome.
Developer(s): Poper Blocker
Language support: English
Home page: Poper Blocker
Difficulty: 
Availability: ![]()
Download: ADD TO CHROME
HOW TO: Installing Poper Blocker on Google Chrome:
1. Go to Chrome web store an search for Poper Blocker, or simple click on the above download link and click on “FREE (ADD TO CHROME)“.
2. Google Chrome asks for user permission to add extension to the web browser. Click on “Add” to install extension to web browsers and “Cancel” to stop the installation process. Chrome also displays, what the extension might access on the web browser.
3. Now, a Poper Blocker icon with message pop up appears at upper right corner of browser, indicating that the extension has successfully integrated with the Chrome.
HOW TO: Using Poper Blocker on Google Chrome:
1. On detecting pop-up for first time, Poper Blocker will ask for you permission regarding blocking.
2. To allow or find out the number of pop-ups blocked, click on the Poper Blocker icon which at top right side of the browser. You can even access settings of Poper Blocker here.
3. Other way to access Poper Blocker settings is via Chrome’s Extension Manager.
HOW TO: Disable/Remove from Google Chrome:
1. Go to Chrome Setting > Tools > Extensions, or simply type “chrome://chrome/extensions/” in URL bar.
2. Now, un-tick the Poper Blocker to temporarily disable the extension. Click on the dustbin icon and you will be greeted with pop-up, click “Remove” to remove the extension from Google Chrome.
Integrating Google Calender into Google Chrome.
Planning ahead is what one does to improve their productivity, and those who love productivity and use Google services are no longer strange to Google Calender. In this post, we shall integrate Google Calender into Google Chrome, helps you keep updated with the upcoming events.
Step 1: Go to Chrome Webstore and add Google Calender.
on successful installation, you will notice calender logo to the top right side of the browser.
Step 2: Authorization.
Step 3: Give permission to access to your Google account.
4. Click on the “+” icon to add an event, click on the curved arrows to sync.
5. To access Calender settings, click on abacus like looking icon.
6. You can even add events directly from the web pages like twitter, facebook by highlight the event and right click the mouse button.
7. To remove, goto extension manager and search for Google Calender tab and click on the dustbin icon.


