Social
How To: Make GIF Images from Videos With Google Chrome Extension.
Love to respond some one with interactive and fun content (talking about GIF images :D), then the extension, MakeGIF Video Capture will help you. With this extension, you can capture HTML5 videos in Google Chrome and convert them into GIF animations.
Developer(s): MakeGIF
Language support: English
Home page: MakeGIF
Difficulty: 
Availability: ![]()
Download: ADD TO CHROME
HOW TO: Installing MakeGIF Video Capture on Google Chrome:
1. Go to Chrome web store an search for MakeGIF Video Capture, or simple click on the above download link and click on “FREE (ADD TO CHROME)“.
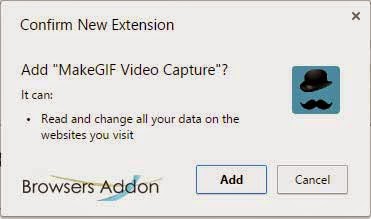
2. Google Chrome asks for user permission to add extension to the web browser. Click on “Add” to install extension to web browsers and “Cancel” to stop the installation process. Chrome also displays, what the extension might access on the web browser.
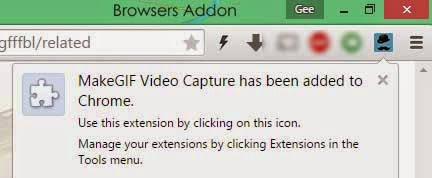
3. Now, MakeGIF Video Capture with message pop up appears at upper right corner of browser, indicating that the extension has successfully integrated with the Chrome.
HOW TO: Using MakeGIF Video Capture on Google Chrome:
1. Open the video on the webpage which you would like to create the GIF image.
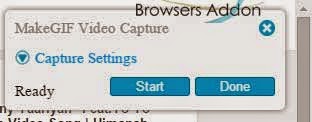
2. Start playing the video. Click on the MakeGIF Video Capture icon which is located at top right side of the browser. Click on the “Start” to start capturing the video. To stop, click on “Done”.
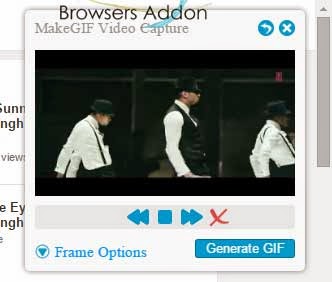
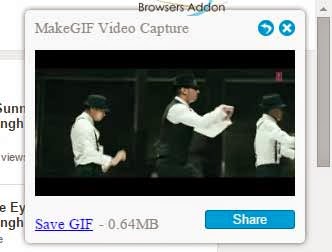
3. You can review the GIF. Click on “Generate GIF” to generate/create the GIF image.
3. To save the the GIF Image, click on “Save GIF” after done capturing the frames.
HOW TO: Disable/Remove from Google Chrome:
1. Go to Chrome Setting > Tools > Extensions, or simply type “chrome://chrome/extensions/” in URL bar.
2. Now, un-tick the MakeGIF Video Capture to temporarily disable the extension. Click on the dustbin icon and you will be greeted with pop-up, click “Remove” to remove the extension from Google Chrome.
This entry was posted in Google Chrome, MakeGIF Video Capture, Social, Video, YouTube.
How To: Transfer Files/Text from Phone to PC and Vice Versa.
If is difficult to juggle things between your phone and PC. To solve this, and to remain in sync with your PC and phone , Pushbullet comes to your rescue. With Pushbullet, one can can send files and text from PC to phone and it is irreversible too. By enabling Push notification, on can receive phone notifications (Whatsapp, incoming call etc.,) on their PC. Pushbullet works with both Mozilla Firefox, Chrome and soon with Apple’s Safari.
Download the Pushbullet app for your mobile phone, Android and iPhone.
Developer(s): Pushbullet
Language support: English
Home page: Pushbullet
Support: Click Here
Difficulty: 
Availability: 
![]()

Download: Free (ADD TO CHROME), Mozilla Firefox
HOW TO: Installing Pushbullet on Google Chrome:
1. Go to Chrome web store an search for Pushbullet, or simple click on the above download link and click on “FREE (ADD TO CHROME)“.
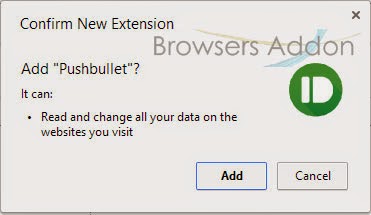
2. Google Chrome asks for user permission to add extension to the web browser. Click on “Add” to install extension to web browsers and “Cancel” to stop the installation process. Chrome also displays, what the extension might access from the web browser.
3. Now, Pushbullet icon with message pop up appears at upper right corner of browser, indicating that the extension has successfully integrated with the Chrome.
HOW TO: Using Pushbullet on Google Chrome:
1. After installing the extension, you need to sign-up/sign-in (possible with Google) .
2. To send files/link/text from your browser to phone, click on the Pushbullet icon at top right.
File received to mobile phone.
3. To read mobile notifications on PC, go to Pushbullet settings in your mobile and enable “Android/PC notifications“.
4. To access Pushbullet settings on your browser, go to Chrome’s extension manager and find the Pushbullet tab and click on the “Options“.
HOW TO: Disable/Remove Pushbullet from Google Chrome:
1. Go to Chrome Setting > Tools > Extensions, or simply type “chrome://chrome/extensions/” in URL bar.
2. Now, un-tick the Pushbullet to temporarily disable the extension. Click on the dustbin icon and you will be greeted with pop-up, click “Remove” to remove the extension from Google Chrome.
This entry was posted in Communications, Google Chrome, Mozilla Firefox, Productivity, Pushbullet, Safari, Social.
How To: Download Vine Videos With One Click.
Love the the 6 seconds gif images (Vine) and like to download it with ease? Then I suggest you to use the “FlashGot Mass Downloader” for Firefox.
Click Here to install FlashGot for Firefox.
Downloading Vine with one-click:
1. Go the page which has the video playing.
2. Look for the Flashgot icon flashing at top right side of the firefox.
3. Click on the icon to download that video.
This entry was posted in Download Management, One Click, Social, Tip, Vine.
Cortex, A Fastest Means To Share Information Across Social Platforms.
Cortex is an extension for Google Chrome which lets you share anything (digital information) across all major social platforms (Facebook, Twitter, Tumblr, Backplane, Gmail, Instapaper, Posterous, Pocket and Share All). Hold the mouse button and share it all, thats it.
Developer(s): Cortex App
Language support: English
Home page: Cortex
Support: Click Here
Difficulty: 
Availability: ![]()
Download: Free (ADD TO CHROME)
HOW TO: Installing Cortex on Google Chrome:
1. Go to Chrome web store an search for Cortex, or simple click on the above download link and click on “FREE (ADD TO CHROME)“.
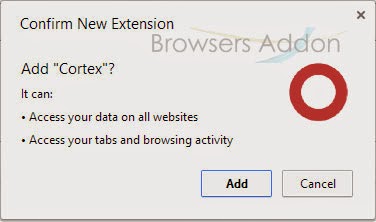
2. Google Chrome asks for user permission to add extension to the web browser. Click on “Add” to install extension to web browsers and “Cancel” to stop the installation process. Chrome also displays, what the extension might access from the web browser.
3. Now, Cortex icon with message pop up appears at upper right corner of browser, indicating that the extension has successfully integrated with the Chrome.
HOW TO: Using Cortex on Google Chrome:
1. After installing the extension, buffer will direct you to the welcome page where you are asked to add the account .
2. Then you are asked to authorize the usage of your social account. (Facebook authorization is shown below).
3. Then a small demo how it works.
Posted on facebook……
4. You can authorize/de-authorize (add/remove) the access to social accounts by going to Google’e Extension Manager and click on “Options” under Cortex tab.
HOW TO: Disable/Remove Cortex from Google Chrome:
1. Go to Chrome Setting > Tools > Extensions, or simply type “chrome://chrome/extensions/” in URL bar.
2. Now, un-tick the Cortex to temporarily disable the extension. Click on the dustbin icon and you will be greeted with pop-up, click “Remove” to remove the extension from Google Chrome.
This entry was posted in Cortex, Google Chrome, Productivity, Social.
Invite All Your Facebook Friends To An Event With One Click With Invite All (For Facebook) Extension.
Invite All (for facebook) is an add-on for Mozilla Firefox and Google Chrome developed by David MM which lets you invite all of your facebook friends to an event with one click by adding “Select All” button which is missing in facebook.
Developer(s): DavidMM
Language support: English.
Home page: Invite All (for facebook)
Support: Click Here
Difficulty: 
Availability: 
![]()
Download: Add to Firefox
Download: +FREE(Add to Chrome)
HOW TO: Installing Invite All (for facebook) on Mozilla Firefox:
1. Go to Invite All (for facebook) Mozilla add-on page, or simply click on the above download link and click on “Add to Firefox“.
2. If Mozilla Firefox asks user permission for installation of addon. Click “Allow” to continue installation, leave it to abort.
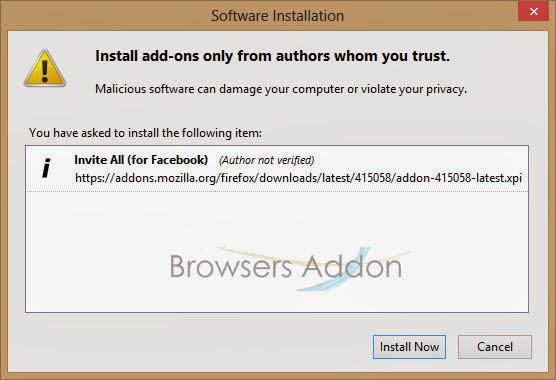
3. Invite All (for facebook) installation box pops-up. Click “Install Now” to continue installing add-on, “Cancel” to abort installation.
4. On successful installation, you should manually restart the browser. Restart the browser to activate the add-on.
HOW TO: Installing Invite All (for facebook) on Google Chrome:
1. Go to Chrome web store an search for Invite All (for facebook), or simple click on the above download link and click on “FREE (ADD TO CHROME)“.
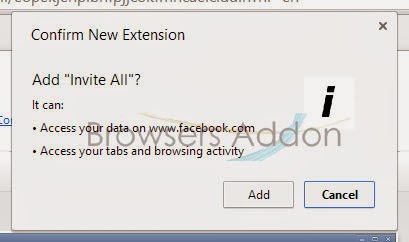
2. Google Chrome asks for user permission to add extension to the web browser. Click on “Add” to install extension to web browsers and “Cancel” to stop the installation process. Chrome also displays, what the extension might access from the web browser.
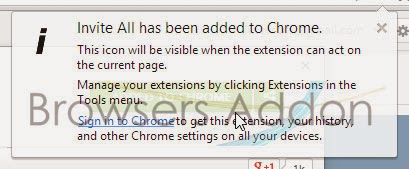
3. Now, Invite All (for facebook) icon with message pop up appears at upper right corner of browser, indicating that the extension has successfully integrated with the Chrome.
HOW TO: Using Invite All (for facebook) on Mozilla Firefox:
1. On successful installation and restarting Firefox, you might also need to log out and log in your facebook account for the button to appear.
HOW TO: Using Invite All (for facebook) on Google Chrome:
1. After installing the extension, Invite All (for facebook) will direct you to the thank page.
DIFFERENCE:
HOW TO: Disable/Remove Invite All (for facebook) from Mozilla Firefox:
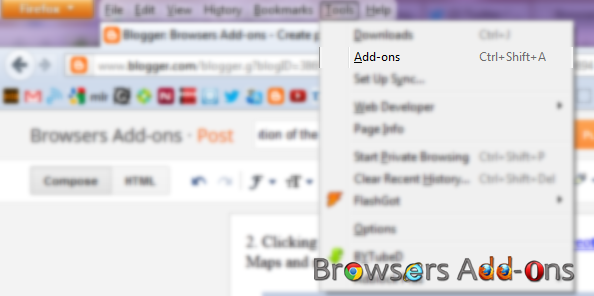
1. Click on the Firefox, located at left upper corner of the web browser and go to “Add-ons”.
or press “Alt“, Menu bar pops-up, then go to Tools > Add-ons, or you can simply use shortcut key “Ctrl+Shift+A” to access add-on (extension) manger.
2. Now, click on “Disable” to disable the add-on temporarily or click “Remove” to remove the add-on permanently from the browser.
NOTE: Both options require restart for the actions to take effect.
HOW TO: Disable/Remove Invite All (for facebook) from Google Chrome:
1. Go to Chrome Setting > Tools > Extensions, or simply type “chrome://chrome/extensions/” in URL bar.
2. Now, un-tick the Invite All (for facebook) to temporarily disable the extension. Click on the dustbin icon and you will be greeted with pop-up, click “Remove” to remove the extension from Google Chrome.
This entry was posted in Facebook, Google Chrome, Invite All for facebook, Mozilla Firefox, Social.
Get Notified When Someone Un-friends You On Facebook.
Developer(s): unfriendnotify
Language support: English and Others….
Home page: fbfriendcheck
Difficulty: 
Availability: 
![]()
Download: Free (ADD TO CHROME)
HOW TO: Installing Unfriend Notify for facebook on Google Chrome:
1. Go to Chrome web store an search for Unfriend Notify for facebook, or simple click on the above download link and click on “FREE (ADD TO CHROME)“.
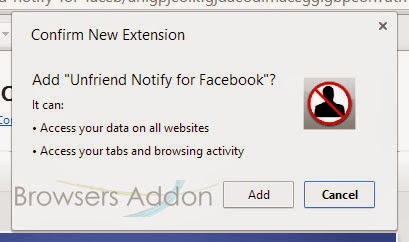
2. Google Chrome asks for user permission to add extension to the web browser. Click on “Add” to install extension to web browsers and “Cancel” to stop the installation process. Chrome also displays, what the extension might access from the web browser.
3. Now, Unfriend Notify for facebook icon with message pop up appears at upper right corner of browser, indicating that the extension has successfully integrated with the Chrome.
HOW TO: Using Unfriend Notify for facebook on Google Chrome:
1. After installing the extension, Unfriend Notify for facebook will direct you to the thank you page and the extension will try to friends list.
2. When ever the extension detects less number of friends, it notifies you. You can check the person who unfriend you by going your facebook profile, click on friends. You will see Lost Friends (x), click on it.
3. To install the same extension on Mozilla Firefox, click here, make sure you open with this Mozilla Firefox.
HOW TO: Disable/Remove Buffer from Google Chrome:
1. Go to Chrome Setting > Tools > Extensions, or simply type “chrome://chrome/extensions/” in URL bar.
2. Now, un-tick the Unfriend Notify for facebook to temporarily disable the extension. Click on the dustbin icon and you will be greeted with pop-up, click “Remove” to remove the extension from Google Chrome.
This entry was posted in Alerts, Facebook, Google Chrome, Mozilla Firefox, Social, Unfriend Notify for facebook.
Chime, One Extension for all Social Network’s Notification Needs.
Chime is a simple extension for Google Chrome which has the capability to build feed from all your social network sites like Facebook, twitter, Reddit and more…., and display right from the chrome with the help of one click. Unlike other, you need not sign-in to aggregate your feed, since all the preferences (data) is stored in your computer and not in server.
Developer(s): Chimeapp
Language support: English
Home page: Chime
Support: Click Here
Difficulty: 
Availability: ![]()
Download: Free (ADD TO CHROME)
HOW TO: Installing Chime on Google Chrome:
1. Go to Chrome web store an search for Chime, or simple click on the above download link and click on “FREE (ADD TO CHROME)“.
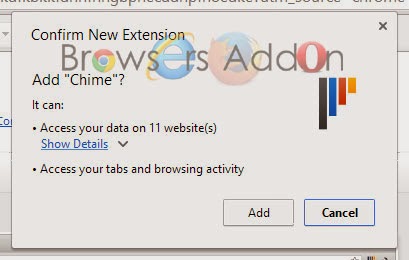
2. Google Chrome asks for user permission to add extension to the web browser. Click on “Add” to install extension to web browsers and “Cancel” to stop the installation process. Chrome also displays, what the extension might access from the web browser.
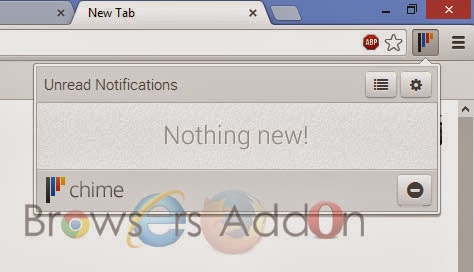
3. Now, Chime icon with message pop up appears at upper right corner of browser, indicating that the extension has successfully integrated with the Chrome.
HOW TO: Using Chime on Google Chrome:
1. After installing the extension, you buffer will direct you to the Chime setup page.
2. Select the services which you would like to receive notification and make sure that you are logged in with services (site) which you would like to receive notifications.
3. You can notice the services selected at right side of the screen. If the service logo is transparent, click on it to login.
4. To view unread notifications, click (LMB) on the Chime icon located at top right side of the URL bar.
5. To view all notifications, click on the lines icon which is left to the gear (settings) icon.
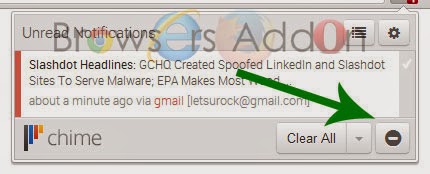
6. To disable/mute notifications, click on the “-” located at bottom right of the Chime pop-up box.
HOW TO: Disable/Remove Chime from Google Chrome:
1. Go to Chrome Setting > Tools > Extensions, or simply type “chrome://chrome/extensions/” in URL bar.
2. Now, un-tick the Chime to temporarily disable the extension. Click on the dustbin icon and you will be greeted with pop-up, click “Remove” to remove the extension from Google Chrome.
This entry was posted in Alerts, Chime, Google Chrome, Social, Updates.
Get Google Plus Notification on Chrome with Official Extension.
If you are a Google + user, Google+ Notifications extension is for you. You will be notified when ever a new update is posted on your stream. Kindly note that this extension sends anonymous usage statistics to Google, automatically which can be disabled in options menu.
Developer(s): Google
Language support: Bahasa Indonesia, Deutsch, English, English (UK), Filipino, Français, Nederlands, Tiếng Việt, Türkçe, català, dansk, eesti, español, español (Latinoamérica), hrvatski, italiano, latviešu, lietuvių, magyar, polski, português (Brasil), português (Portugal), română, slovenský, slovenščina, suomi, svenska, čeština, Ελληνικά, Српски, български, русский, українська, עברית, हिन्दी, ไทย, العربية, 中文 (简体), 中文 (繁體), 日本語, 한국어
Home page: Google+ Notifications
License: Google Privacy Policy
Difficulty: 
Availability: ![]()
Download: FREE (ADD TO CHROME)
HOW TO: Installing Google+ Notifications on Google Chrome:
1. Go to Chrome web store an search for Google+ Notifications, or simple click on the above download link and click on “FREE (ADD TO CHROME)“.
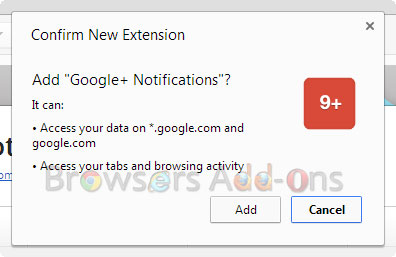
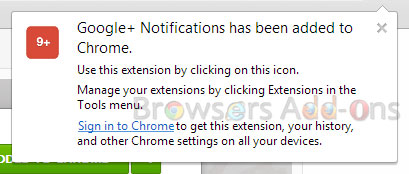
2. Google Chrome asks for user permission to add extension to the web browser. Click on “Add” to install extension to web browsers and “Cancel” to stop the installation process. Chrome also displays, what the extension might access on the web browser.
3. Now, a Google+ Notifications icon with message pop up appears at upper right corner of browser, indicating that the extension has successfully integrated with the Chrome.
HOW TO: Using Google+ Notifications on Google Chrome:
1. On successful installation, you will notice Google+’s bell icon at top right side of Chrome browser.
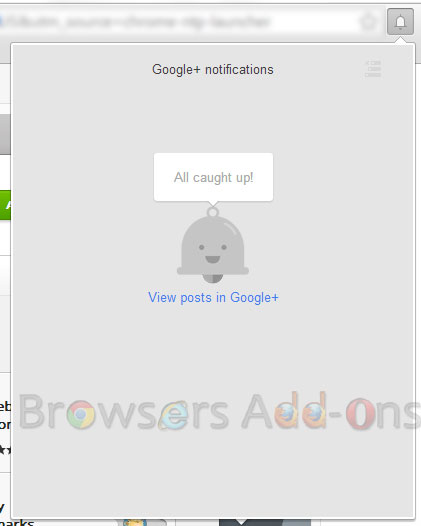
2. Clicking on that icon will displays Google + Notifications.
3. To disable sending anonymous stats to Google, go to Google Chrome Extension Manger, click on “Options.”
HOW TO: Disable/Remove Google+ Notifications from Google Chrome:
1. Go to Chrome Setting > Tools > Extensions, or simply type “chrome://chrome/extensions/” in URL bar.
2. Now, un-tick the Google+ Notifications to temporarily disable the extension. Click on the dustbin icon and you will be greeted with pop-up, click “Remove” to remove the extension from Google Chrome.
This entry was posted in Google, Google Chrome, Google Plus Notifcations, Social.
Using Google Mail Checker Extension on Google Chrome.
Google Mail Checker is an extension developed by Google for Chrome browsers which displays the number of unread mail from your Gmail (current logged-in) account. You can directly go to inbox by clicking on the Google Mail Checker icon located at top right side of the browser.
Developer(s): Google
Language support: Bahasa Indonesia, Deutsch, English, English (UK), Filipino, Français, Nederlands, Tiếng Việt, Türkçe, català, dansk, eesti, español, español (Latinoamérica), hrvatski, italiano, latviešu, lietuvių, magyar, polski, português (Brasil), português (Portugal), română, slovenský, slovenščina, suomi, svenska, čeština, Ελληνικά, Српски, български, русский, українська, עברית, हिन्दी, ไทย, العربية, 中文 (简体), 中文 (繁體), 日本語, 한국어
Home page: Google Mail Checker
Difficulty: 
Availability: ![]()
Download: FREE (ADD TO CHROME)
HOW TO: Installing Google Mail Checker on Google Chrome:
1. Go to Chrome web store an search for Google Mail Checker, or simple click on the above download link and click on “ADD TO CHROME“.
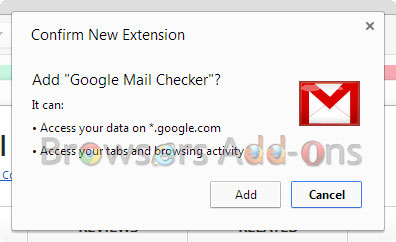
2. Google Chrome asks for user permission to add extension to the web browser. Click on “Add” to install extension to web browsers and “Cancel” to stop the installation process. Chrome also displays, what the extension might access on the web browser.
3. Now, a gmail icon with message pop up appears at upper right corner of browser, indicating that the extension has successfully integrated with the Chrome.
HOW TO: Using Google Mail Checker on Google Chrome:
1. So, next time when a mail landed into inbox, you will be notified with number of unread mails like this at top right side of chrome browser.
2. Click on the Google Mail Checker icon will take you to current logged-in gmail account.
Note: This is only work when a gmail account is logged in or when running background.
HOW TO: Disable/Remove Google Mail Checker from Google Chrome:
1. Go to Chrome Setting > Tools > Extensions, or simply type “chrome://chrome/extensions/” in URL bar.
2. Now, un-tick the Google Mail Checker to temporarily disable the extension. Click on the dustbin icon and you will be greeted with pop-up, click “Remove” to remove the extension from Google Chrome.
This entry was posted in Alerts, Communications, Gmail, Google, Google Mail Checker, Social.
An Insightful social sharing made easy with Buffer extension for Chrome.
Buffer is an extension for Google Chrome which makes sharing content across social media like Facebook, Twitter, LinkedIn with one click but, with difference. On sharing content with Buffer, your post (content) will be well posted at better time, well spaced out over the day, claims Buffer. Apart from sharing, you can schedule content when to be posted. Buffer also provides analytics with each share. This app will prove very helpful for web publishers and marketers.
There is a pro, paid version called awesome, which helps you connect to 12 social networks at once.
Developer(s): Buffer Apps
Language support: Deutsch, English, español, русский
Home page: Buffer Apps
License: Terms & Conditions.
Difficulty: 

Availability: 
![]()

Download: ADD TO CHROME
HOW TO: Installing Buffer on Google Chrome:
1. Go to Chrome web store an search for Buffer, or simple click on the above download link and click on “ADD TO CHROME“.
2. Google Chrome asks for user permission to add extension to the web browser. Click on “Add” to install extension to web browsers and “Cancel” to stop the installation process. Chrome also displays, what the extension might access on the web browser.
3. Now, Buffer icon with message pop up appears at upper right corner of browser, indicating that the extension has successfully integrated with the Chrome.
HOW TO: Using Buffer on Google Chrome:
1. After installing the extension, buffer will direct you to the welcome page.
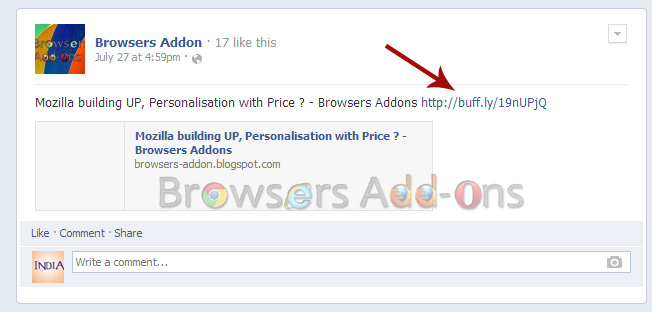
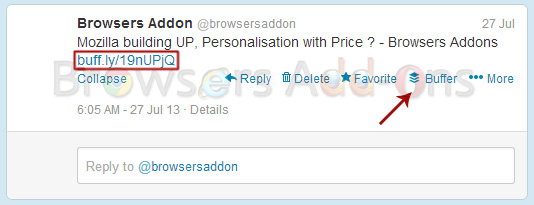
2. Click on the Buffer icon when you like to buffer/share an article from the current web page. Buffer, then automatically fetches the article and shortens URL. Clicking on “Share Now“, Buffer will be post the fetched article immediately to added social network account, clicking on “Buffer“, Buffer will choose the best time and post it on behalf of you.
3. But before posting via buffer, we need to add social accounts with buffer, here is how to do it. You can add social accounts like Twitter, Facebook, Linked In right from the buffer dashboard. Make sure you authorize it.
4. You can even re-post the same article at desired time and date with schedule option.
HOW TO: Disable/Remove Buffer from Google Chrome:
1. Go to Chrome Setting > Tools > Extensions, or simply type “chrome://chrome/extensions/” in URL bar.
2. Now, un-tick the Buffer to temporarily disable the extension. Click on the dustbin icon and you will be greeted with pop-up, click “Remove” to remove the extension from Google Chrome.
This entry was posted in Analytics, Buffer, Google Chrome, Productivity, Social.


