Alerts
Read, Reply, Mark, Delete Emails right from the Browser with Gmail™ Notifier Plus Extension.
Gmail™ Notifier Plus is an add-on for Mozilla Firefox which alerts its users of new email messages from Gmail. With improved and minimalistic UI, this add-on is easy to use. Users can also ready, delete or mark the emails, all without need to open Gmail Tab.
Features:
1. No requirement to enter your credentials.
2. Multiple label support.
3. Low bandwidth usage by using RSS technology.
4. See your complete Gmail inbox in the toolbar Panel.
5. Counter of unread emails from all your email labels.
6. Play a Beep sound when new email(s) arrives (to enable this feature see extension options page).
7. Show a notification popup when new email(s) arrives (to disable this feature see extension options page).
Developer(s): Alexis Jaksone, Belav
Language support: English
Home page: Fastest Gmail.
Difficulty: 
Availability: 

Download: Add to Firefox
HOW TO: Installing Gmail™ Notifier Plus on Mozilla Firefox:
1. Go to Gmail™ Notifier Plus Mozilla add-on page, or simply click on the above download link and click on “Add to Firefox“.
2. If Mozilla Firefox asks user permission for installation of addon. Click “Allow” to continue installation, leave it to abort.
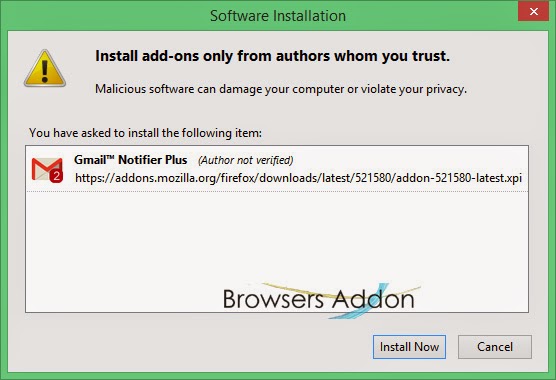
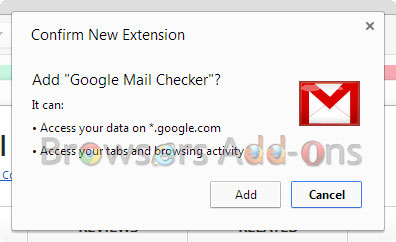
3. Gmail™ Notifier Plus installation box pops-up. Click “Install Now” to continue installing add-on, “Cancel” to abort installation.
4. On successful installation, Gmail™ Notifier Plus will notify the same, this add-on doesn’t require to activate the add-on.
HOW TO: Using Gmail™ Notifier Plus on Mozilla Firefox:
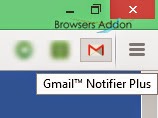
1. On successful installation, you will notice that Gmail icon will appear at top right side of the browser.
2. Click the Gmail icon, log-in with Gmail credentials. On successful login, you will be able to access the email(s) from Gmail.
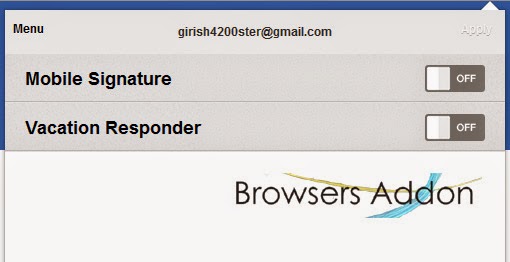
3. Minimal settings.
4. Notification popup upon arrival of new email.
HOW TO: Disable/Remove Gmail™ Notifier Plus from Mozilla Firefox:
1. Click on the Firefox, located at left upper corner of the web browser and go to “Add-ons”.
or press “Alt“, Menu bar pops-up, then go to Tools > Add-ons, or you can simply use shortcut key “Ctrl+Shift+A” to access add-on (extension) manger.
2. Now, click on “Disable” to disable the add-on temporarily or click “Remove” to remove the add-on permanently from the browser.
NOTE: Both options doesn’t require restart for the actions to take effect.
Block Ads and Adware Intruding your Opera Browsers with Adguard.
Adgurd is an extension for Opera which blocks all types of advertisement like banners, pop-up, video ads, sponsored links etc., The best part of this extension is that it supports whitelist, multi language filters and you can create a rule for yourself. It also claims to provide protection against phishing and malware. Your get some extra features and premium protection with paid plan.
Developer(s): AdGurad
Language support: English and русский
Home page: AdGuard
Difficulty: 
Support: Help Center
Availability: 

![]()

Download: Add to Opera
HOW TO: Installing Adguard on Opera:
1. Go to Adguard Opera add-ons page, or simply click on the above download link and click on “Add to Opera“.
2. On successful installation, “+ Add to Opera” turns to “ ” and you will be directed to First Run / Preference page.
HOW TO: Using Adguard on Opera:
1. On successful installation, you will directed to Adguard welcome page and you can notice the disappearance of ADS when you start browsing normally.
With Adguard OFF:
With AdGuard ON:
2. You can even notice the number of items blocked.
3. To access Adguard Options (preferences), right click on the Adguard extension to access options.
HOW TO: Disable/Remove Adguard on Opera:
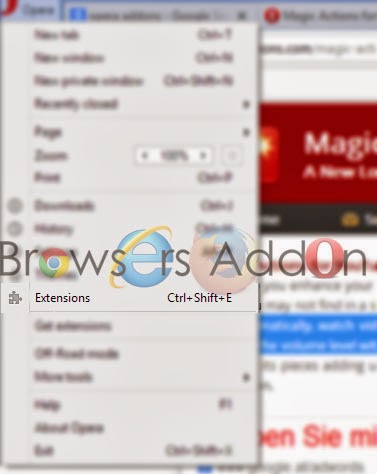
1. To Disable/Remove this extension, click (LMB) on the Opera which at top left side of the browsers or press “Ctrl”+”Shift”+”E” to go to Opera’s Extension.
2. Search for desired tab, click on “Disable” to disable and “X” to remove the extension from the opera browser.
Scan for Updates and get Notification from you Favorite Sites without Subscribing with Update Scanner.
Developer(s): sneakypete81
Language support: English
Home page: Update Scanner
License: MPL License v1.1
Donate: Click Here
Difficulty: 
Availability: 
Download: Add to Firefox
HOW TO: Installing Update Scanner on Mozilla Firefox:
1. Go to Update Scanner Mozilla add-on page, or simply click on the above download link and click on “Add to Firefox“.
2. If Mozilla Firefox asks user permission for installation of add-on. Click “Allow” to continue installation, leave it to abort.
3. Updates Scanner installation box pops-up. Click “Install Now” to continue installing add-on, “Cancel” to abort installation.
4. On successful installation, Update Scanner asks user permission to restart the browser. Restart the browser to activate the add-on.
HOW TO: Using Update Scanner on Mozilla Firefox:
1. You will notice Update Scanner icon in Add-on bar. Click on it to open Update Scanner. Click on the “New Entry” to subscribe/follow the website.
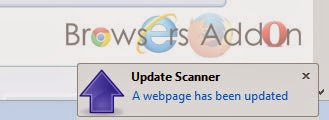
2. You will receive notification when ever there is an update in website. To manually get the update, click on the “Scan”.
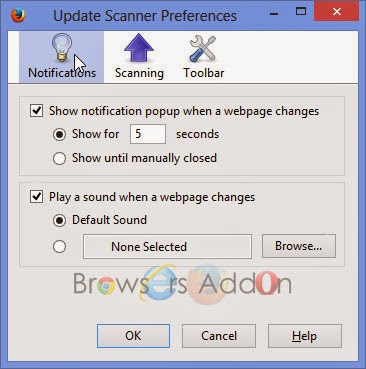
3. To change preferences, click on Tools icon.
4. Updated Text (content) will be highlighted with color (yellow by default). And to edit the subscribe site preferences, click on the desired site in Update Scanner tab, you will notice this (below screenshot) in web page.
HOW TO: Disable/Remove Update Scanner from Mozilla Firefox:
1. Click on the Firefox, located at left upper corner of the web browser and go to “Add-ons”.
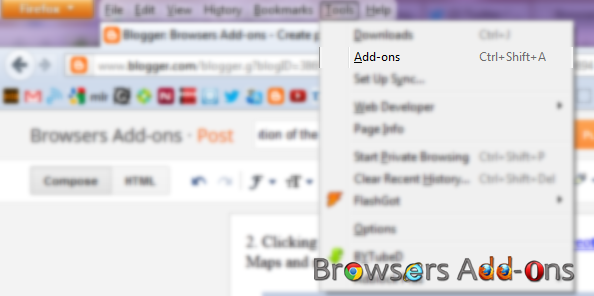
or press “Alt“, Menu bar pops-up, then go to Tools > Add-ons, or you can simply use shortcut key “Ctrl+Shift+A” to access add-on (extension) manger.
2. Now, click on “Disable” to disable the add-on temporarily or click “Remove” to remove the add-on permanently from the browser.
NOTE: Both options require restart for the actions to take effect.
Flagfox add-on, a handy tool to get Technical Information with Shortcut keys.
Flagfox is an add-on developed by Dave G for Mozilla Firefox which shows more than flags of the countries in which the site server is hosted. Flagfox comes handy to web publishers by hosting several tools like Alexa, Geotool, Whois, SiteAdvisor and other tools which helps in improving SEO. You can add custom actions (new sites) by shortcut keys. To know more about Flagfox features, see end of this post.
Developer(s): Dave G
Language support: English
Home page: Flagfox
License: Custom License
Difficulty: 
Availability: 
Download: Add to Firefox
HOW TO: Installing Flagfox on Mozilla Firefox:
1. Go to Flagfox Mozilla add-on page, or simply click on the above download link and click on “Add to Firefox“.
2. If Mozilla Firefox asks user permission for installation of addon. Click “Allow” to continue installation, leave it to abort.
3. Flagfox installation box pops-up. Click “Install Now” to continue installing add-on, “Cancel” to abort installation.
4. On successful installation, Flagfox asks user permission to restart the browser. Restart the browser to activate the add-on.
HOW TO: Using Flagfox on Mozilla Firefox:
1. After restarting the Firefox browsers, you will notice National Flags side to ‘Refresh‘ icon, inside URL bar. Hover on flag to know more about domain info.
2. To access different features, right click (RMB) on the flag icon and choose the desired services. You can add/remove services via ‘Options‘.
To add services, check it, to remove services, un-check it.
3. To add custom actions (service), click on “+ Add new actions” in Options. Make sure to copy the URL of the service to be add and paste them in the “Template:“. Add the desired description and custom shortcut keys combo and click “Save“. You will notice the newly added service in Flagfox tray.
HOW TO: Disable/Remove Flagfox from Mozilla Firefox:
1. Click on the Firefox, located at left upper corner of the web browser and go to “Add-ons”.
or press “Alt“, Menu bar pops-up, then go to Tools > Add-ons, or you can simply use shortcut key “Ctrl+Shift+A” to access add-on (extension) manger.
2. Now, click on “Disable” to disable the add-on temporarily or click “Remove” to remove the add-on permanently from the browser.
NOTE: Both options require restart for the actions to take effect.
Flagfox Features:
- Geotools
- Site safety and malware checks
- Finding similar sites and reviews
- Automatic translation to your language
- SEO and web development research
- Diagnostics like pings and traceroutes
- Whois and DNS information
- Page code validation
- Quick URL shortening
- Copying a server’s IP address or other info…..
Take a Break, a must and should Firefox addon for Workaholics.
Take a Break is a simple but very useful add-on developed by Zen for Mozilla Firefox. This add-on is must and should for those who spend countless hours in-front of computer. Take a Break add-on, on setting reminder, alerts the user with flash/sound for specified amount of time at specified intervals.
Developer(s): Zen
Language support: English
Home page: Take a Break
License: Custom License
Donate: Click here
Difficulty: 
Availability: 
Download: Add to Firefox
HOW TO: Installing Take a Break on Mozilla Firefox:
1. Go to Take a Break Mozilla add-on page, or simply click on the above download link and click on “Add to Firefox“.
2. If Mozilla Firefox asks user permission for installation of addon. Click “Allow” to continue installation, leave it to abort.
3. Take a Break installation box pops-up. Click “Install Now” to continue installing add-on, “Cancel” to abort installation.
4. On successful installation, Take a Break asks user permission to restart the browser. Restart the browser to activate the add-on.
HOW TO: Using Take a Break on Mozilla Firefox:
1. Now, you should see Take a Break add-on in add-ons bar. If you don’t see any add-ons bar at bottom of the firefox browser, press “Ctrl” + “/” to enable add-ons bar.
2. Right Click (RMB) on Take a Break icon to change preferences.
3. There are two ways in which Take a Break alerts users, first with small blink which in my opinion is non-deviating  , other with pop-up reminder.
2. To enable/disable reminder, left click on Take a Break icon, once. When Take a Break is disabled, it looks like this  .
.
HOW TO: Disable/Remove Take a Break from Mozilla Firefox:
1. Click on the Firefox, located at left upper corner of the web browser and go to “Add-ons”.
or press “Alt“, Menu bar pops-up, then go to Tools > Add-ons, or you can simply use shortcut key “Ctrl+Shift+A” to access add-on (extension) manger.
2. Now, click on “Disable” to disable the add-on temporarily or click “Remove” to remove the add-on permanently from the browser.
NOTE: Both options require restart for the actions to take effect.
Find out who is tracking you in real-time with Collusion, addon for Mozilla Firefox.
Collusion is an experimental add-on (extension) for Mozilla Firefox, a brainchild of Atul Verma which lets you see which websites are using 3rd party cookies to keep an eye on you with their dot connectors. All the data shown is real time in spider web like UI connection. Find more about the Collusion project.
Developer(s): Jono X, Dethe Elza and others.
Language support: English
Home page: Collusion, github/collusion
License: Custom License
Difficulty: 
Availability: 
Download: Add to Firefox
HOW TO: INSTALLING COLLUSION ON MOZILLA FIREFOX:
1. Go to Collusion Mozilla addon page, or simply click on the above download link and click on “Add to Firefox“.
2. If Mozilla Firefox asks user permission for installation of addon. Click “Allow” to continue installation, leave it to abort.
3. Collusion installation box pops-up. Click “Install” to continue installing addon, “Cancel” to abort installation.
4. On successful installation, a message pops-up confirming the same.
HOW TO: USING COLLUSION ON MOZILLA FIREFOX:
1. Now, you can see Collusion add-on on the right side of the add-on bar. If you don’t see Add-on bar, press “Ctrl”+”/”.
2. Click on the collusion add-on to see which sites are watching you and how they linked. All this information are in real time.
3. Hover/Click on circle to know more about site.
Link between various sites, below screenshot shows google.analytics.com serves a link among theverge.com, engadget.com and google.com .
4. If the spiral are extended links are not visible on the screen. Click (LMB) any where on the Collusion webpage and move in the desired direction.
HOW TO: DISABLE/REMOVE COLLUSION FROM MOZILLA FIREFOX:
1. Click on the Firefox, located at left upper corner of the web browser and go to “Add-ons”.
or press “Alt“, Menu bar pops-up, then go to Tools > Add-ons, or you can simply use shortcut key “Ctrl+Shift+A” to access addon (extension) manger.
2. Now, click on “Disable” to disable the addon temporarily or click “Remove” to remove the addon permanently from the browser.
NOTE: This add-on doesn’t require restart for the actions to take effect.


