Privacy
How to Bypass Geo-blocking to Access Content with Firefox Extension for Free.
ProxMate is add-on which lets its user bypass the geo-location based restriction to access your favorite content or service(s). ProxMate is available for all the popular browsers like Google Chrome, Mozilla Firefox and Opera.
Why you should use Proxmate (according to author)?
- Faster – Claims to be faster than VPN.
- Pluggable – ProxMate allows you to pick exact package of the service(s) which you would like to access.
- Secure – SSL will stay SSL.
- Open Source – No more secrets.
- Support.
Developer(s): Personalitycores.
Language support: English
Home page: ProxMate
Difficulty: 
Availability: 
![]()

Download: Add to Firefox
HOW TO: Installing ProxMate on Mozilla Firefox:
1. Go to ProxMate Mozilla add-on page, or simply click on the above download link and click on “Add to Firefox“.
2. If Mozilla Firefox asks user permission for installation of addon. Click “Allow” to continue installation, leave it to abort.
3. ProxMate installation box pops-up. Click “Install Now” to continue installing add-on, “Cancel” to abort installation.
4. On successful installation, ProxMate doesn’t require restart to activate the add-on.
HOW TO: Using ProxMate on Mozilla Firefox:
1. On successful installation, you will notice ProxMate button at top right side of the browser, next to Mozilla’s “Open menu“.
2. Click on it to install the package(s). You need to install specific package to bypass specific service restriction. For sake of testing, I tried Vevo.
3. Before and after installing the ProxMate’s Vevo package.
HOW TO: Disable/Remove ProxMate from Mozilla Firefox:
1. Click on the Firefox, located at left upper corner of the web browser and go to “Add-ons”.
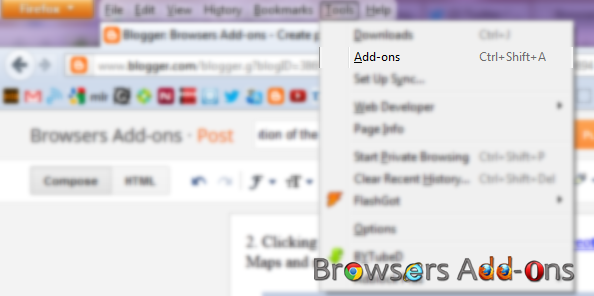
or press “Alt“, Menu bar pops-up, then go to Tools > Add-ons, or you can simply use shortcut key “Ctrl+Shift+A” to access add-on (extension) manger.
2. Now, click on “Disable” to disable the add-on temporarily or click “Remove” to remove the add-on permanently from the browser.
NOTE: Both options doesn’t require restart for the actions to take effect.
Browse Internet with Premium and Secure Incognito Mode with Spotflux Lite.
Spotflux Lite is an extension for Google Chrome which encrypts your web browsing and gives you privacy and security. Spotflux encryption is done via SSL, hides your IP address. With this extension, you will have free VPN within Chrome browser. Spotflux claims to protect against anti-malware, anti-phishing protection as well as SPDY content acceleration.
Developer(s): Spotflux
Language support: English
Home page: Spotflux
Difficulty: 
Availability: ![]()
Download: ADD TO CHROME
HOW TO: Installing Spotflux Lite on Google Chrome:
1. Go to Chrome web store an search for Spotflux Lite, or simple click on the above download link and click on “FREE (ADD TO CHROME)“.
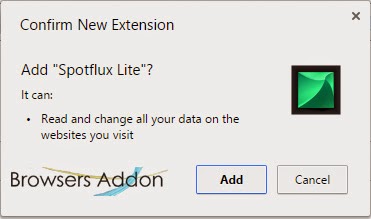
2. Google Chrome asks for user permission to add extension to the web browser. Click on “Add” to install extension to web browsers and “Cancel” to stop the installation process. Chrome also displays, what the extension might access on the web browser.
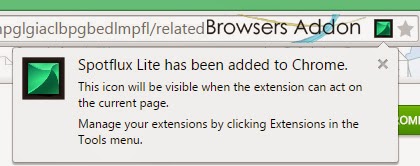
3. Now, a Spotflux Lite icon with message pop up appears at upper right corner of browser, indicating that the extension has successfully integrated with the Chrome.
HOW TO: Using Spotflux Lite on Google Chrome:
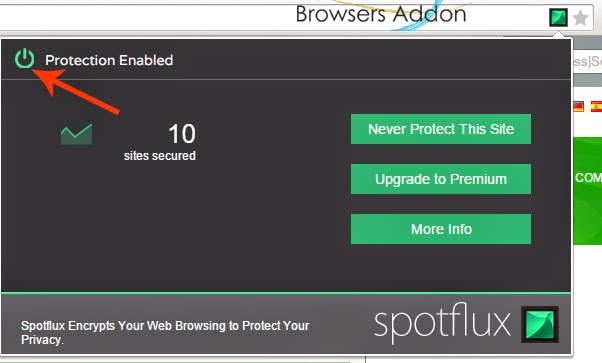
1. On installation, by default, Spotflux gets active, you can know this by noticing Spotflux icon with URL(address) bar.
2. To disable Spotflux Lite protection, click on the Spotflux Lite icon which is within URL bar, Spotflux Lite pops-up, click on the power icon to disable.
3. To enjoy more and customized features, you need to upgrade to premium.
HOW TO: Disable/Remove Spotflux Lite from Google Chrome:
1. Go to Chrome Setting > Tools > Extensions, or simply type “chrome://chrome/extensions/” in URL bar.
2. Now, un-tick the Spotflux Lite to temporarily disable the extension. Click on the dustbin icon and you will be greeted with pop-up, click “Remove” to remove the extension from Google Chrome.
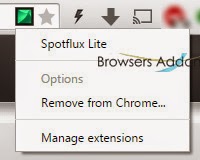
or you can remove directly from URL bar by right clicking the Spotflux Lite icon.
Mozilla Gyan for Privacy and Tips.
As we all know how Mozilla is passionate about users online privacy, it has come up with four easy easy step which it claims you to make smart on privacy.
1. Ask
Mostly asks you whether are you really interested in online privacy and shows study results regarding that.
2. Learn
Tries to educate about privacy, and why privacy matters. It even suggests an add-on which helps you to see who (services) are tracking your browser activities.
3. Act
Suggests you how to take control of your online privacy, which includes Mozilla’s Firefox features like “Do not track” and “Forget button“, and suggest you to use duckduckgo for as default search engine.
Other privacy add-ons.
4. Discuss
Source: Mozilla privacy tips.
Opt-out of Google’s DoubleClick Internet Based Advertisement with Chrome Extension.
Note: This doesn’t block ads by Google.
Developer(s): Google
Language support: English
Home page: IBA Opt-out
Support: Terms & Conditions.
Difficulty: 
Availability: ![]()
Download: Free (ADD TO CHROME)
HOW TO: Installing IBA Opt-out on Google Chrome:
1. Go to Chrome web store an search for IBA Opt-out, or simple click on the above download link and click on “FREE (ADD TO CHROME)“.
2. Google Chrome asks for user permission to add extension to the web browser. Click on “Add” to install extension to web browsers and “Cancel” to stop the installation process. Chrome also displays, what the extension might access from the web browser.
3. Now, Google icon with message pop up appears at upper right corner of browser, indicating that the extension has successfully integrated with the Chrome.
HOW TO: Disable/Remove IBA Opt-out from Google Chrome:
1. Go to Chrome Setting > Tools > Extensions, or simply type “chrome://chrome/extensions/” in URL bar.
2. Now, un-tick the IBA Opt-out to temporarily disable the extension. Click on the dustbin icon and you will be greeted with pop-up, click “Remove” to remove the extension from Google Chrome.
How To: Opt Out of Google Analytics with Chrome Extension.
Developer(s): Google
Language support: Deutsch, English, English (UK), Français, Nederlands, Türkçe, español, italiano, polski, português (Brasil), русский, ไทย, العربية, 中文 (简体), 中文 (繁體), 日本語, 한국어
Home page: Google Analytics Opt-out
Support: Click Here
Difficulty:

Availability:
Download: Free (ADD TO CHROME)
HOW TO: Installing Opt Out of Google Analytics on Google Chrome:
1. Go to Chrome web store an search for Opt Out of Google Analytics, or simple click on the above download link and click on “FREE (ADD TO CHROME)“.
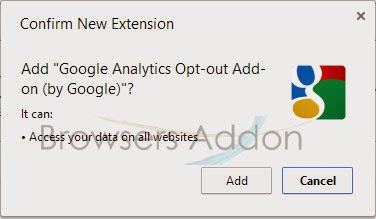
2. Google Chrome asks for user permission to add extension to the web browser. Click on “Add” to install extension to web browsers and “Cancel” to stop the installation process. Chrome also displays, what the extension might access from the web browser.
3. Now, Google icon with message pop up appears at upper right corner of browser, indicating that the extension has successfully integrated with the Chrome.
HOW TO: Using Opt Out of Google Analytics on Google Chrome:
1. To check whether it works or not, try Collusion for Chrome
HOW TO: Disable/Remove Opt Out of Google Analytics from Google Chrome:
1. Go to Chrome Setting > Tools > Extensions, or simply type “chrome://chrome/extensions/” in URL bar.
2. Now, un-tick the Opt Out of Google Analytics to temporarily disable the extension. Click on the dustbin icon and you will be greeted with pop-up, click “Remove” to remove the extension from Google Chrome.
Clear Console, an Extension to Clear Background Data from Mozilla Firefox with One Click.
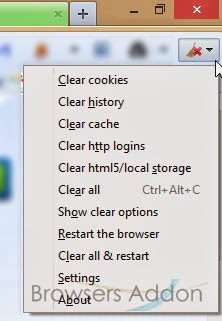
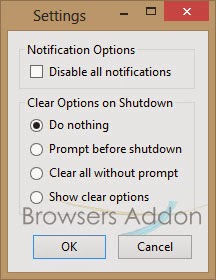
Clear Console is an add-on for Mozilla Firefox developed by QBurst which clears cache, cookies, history, logins and local storage with one click. On clearing, you can get notification or not, depends on preference.
Developer(s): Rejah Rehim A A, Sreenath Sasikumar, QBurst
Language support: English.
Home page: Clear Console
License: MPL v1.1
Difficulty: 
Availability: 
Download: Add to Firefox
HOW TO: Installing Clear Console on Mozilla Firefox:
1. Go to Clear Console Mozilla add-on page, or simply click on the above download link and click on “Add to Firefox“.
2. If Mozilla Firefox asks user permission for installation of add-on. Click “Allow” to continue installation, leave it to abort.
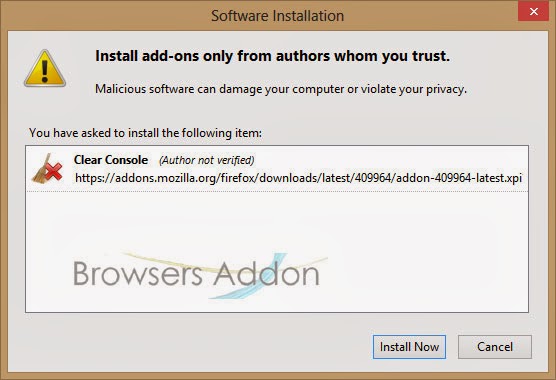
3. Clear Console installation box pops-up. Click “Install Now” to continue installing add-on, “Cancel” to abort installation.
4. On successful installation, Clear Console asks user permission to restart the browser. Restart the browser to activate the add-on.
HOW TO: Using Clear Console on Mozilla Firefox:
1. On successful installation, you will notice Clear Console icon to top right side of the Firefox.
2. To access preferences, you can click on “Settings” or go to Mozilla Firefox Add-ons Manager, search for “Clear Console” tab and click on “Options“.
HOW TO: Disable/Remove Clear Console from Mozilla Firefox:
1. Click on the Firefox, located at left upper corner of the web browser and go to “Add-ons”.
or press “Alt“, Menu bar pops-up, then go to Tools > Add-ons, or you can simply use shortcut key “Ctrl+Shift+A” to access add-on (extension) manger.
2. Now, click on “Disable” to disable the add-on temporarily or click “Remove” to remove the add-on permanently from the browser.
NOTE: Both options require restart for the actions to take effect.
What are Browser Cookies ? How to Manage it in Mozilla Firefox.
Cookies are stored on your computer by websites you visit and contain information such as site preferences or login status. This article describes how to delete cookies in Firefox. …….
Source: Mozilla Support
Browse in Private Windows by Default Without Opening New Private Window in Mozilla Firefox.
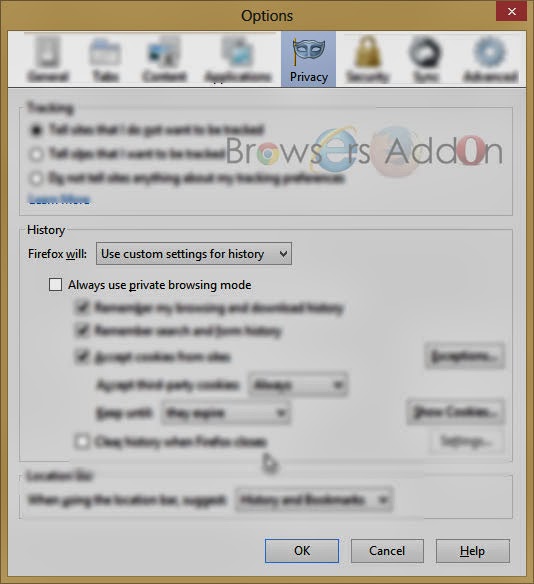
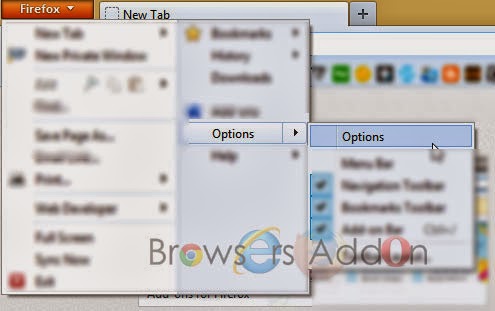
Step 1: Go to Mozilla Firefox > Options.
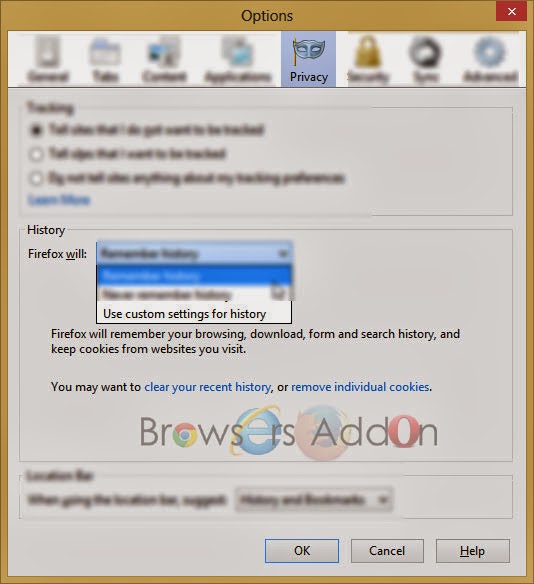
Step 2: Click on the Privacy Tab.
Step 3: Under History, choose “Use custom setting for history“.
Step 4: Check “Always use private browsing mode“.
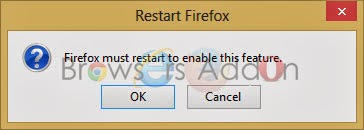
A pop-up asks you to restart Mozilla Firefox in order for the action to take effect. Click “OK“.
Collusion for Chrome helps you Visualize and Block the Sites which Tracks you Silently.
Collusion for Chrome is extension from Disconnect.ME which helps you visualize and block those site which are tracking your surfing behavior with the help of cookies. There is a similar add-on named “Collusion” for Mozilla Firefox which does the same function and even has the same name, but the add-on is developed with the help of Mozilla Foundation.
Developer(s): Disconnect
Language support: English
Home page: Disconnect
Support: Click Here
Difficulty: 
Availability: 
![]()


Download: Free (ADD TO CHROME)
HOW TO: Installing Collusion for Chrome on Google Chrome:
1. Go to Chrome web store an search for Collusion for Chrome, or simple click on the above download link and click on “FREE (ADD TO CHROME)“.
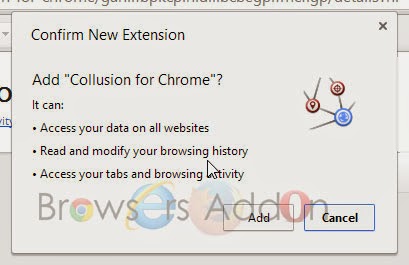
2. Google Chrome asks for user permission to add extension to the web browser. Click on “Add” to install extension to web browsers and “Cancel” to stop the installation process. Chrome also displays, what the extension might access on the web browser.
3. Now, Collusion for Chrome icon with message pop up appears at upper right corner of browser, indicating that the extension has successfully integrated with the Chrome.
HOW TO: Using Collusion for Chrome on Google Chrome:
1. After installing the extension, you will notice Collusion for Chrome extension right side of URL bar. The extension starts notify its user when ever it detects any cookies monitoring you. It even shows how may are cookies are monitoring you. Click on the extension to get a visual look.
2. Click on the “block known tracking sites” to restrict those cookies which are not from big sites like Google, Facebook., etc.,
3. Explore more options from the sidebar of the Collusion Popup.
HOW TO: Disable/Remove Collusion for Chrome from Google Chrome:
1. Go to Chrome Setting > Tools > Extensions, or simply type “chrome://chrome/extensions/” in URL bar.
2. Now, un-tick the Collusion for Chrome to temporarily disable the extension. Click on the dustbin icon and you will be greeted with pop-up, click “Remove” to remove the extension from Google Chrome.
Get Anonymous without Proxies with AnonymoX Addon for Mozilla Firefox.
AnonymoX is an add-on for Mozilla Firefox which helps you hide your IP address and get a pseudo one from different regions so that you can surf the internet anonymously. The services is for free but comes with terms and conditions like you will not able to enjoy the speed which you with this add-on, there is limit for download and you will less chance to change IP address with the desired ones. There is premium model to over come this restriction. Compare between Free versus Premium package.
Developer(s): NilsHügelmann, ochristi, theChaoS
Language support: English and Deutsch
Home page: anonymoX
License: Custom License
Difficulty: 
Availability: 
Download: Add to Firefox
HOW TO: Installing anonymoX on Mozilla Firefox:
1. Go to anonymoX Mozilla add-on page, or simply click on the above download link and click on “Add to Firefox“.
2. If Mozilla Firefox asks user permission for installation of add-on. Click “Allow” to continue installation, leave it to abort.
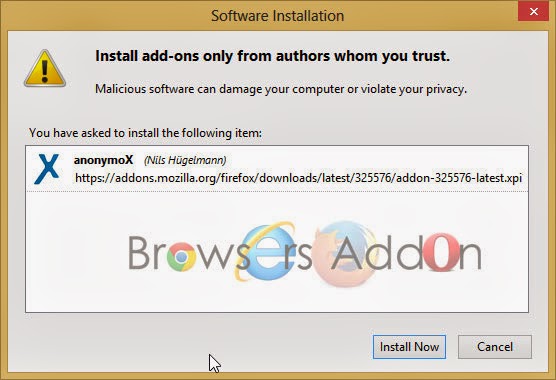
3. anonymoX installation box pops-up. Click “Install Now” to continue installing add-on, “Cancel” to abort installation.
4. On successful installation, anonymoX asks user permission to restart the browser. Restart the browser to activate the add-on.
HOW TO: Using anonymoX Weather on Mozilla Firefox:
1. On successful installation, you will be asked to restart firefox, after restarting you will redirected to anonymoX starting page which shows what is anonymoX, how is works and its model.
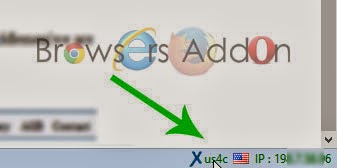
2. At down, in add-ons bar, you can notice that anonymoX has been assigned a new IP address to you Firefox browser.
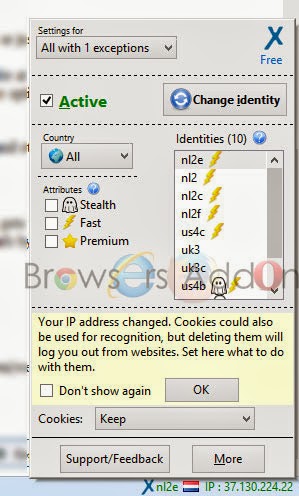
3. To change preference, or to get a new identity, click on the X icon which is in the add-ons bar.
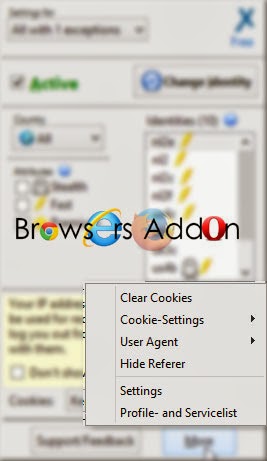
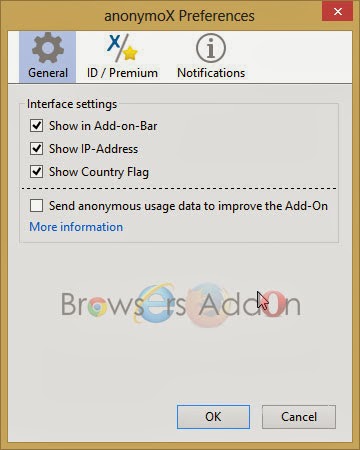
4. To access anonymoX settings, click on More. Or you can do it from Mozilla Add-ons Manager.
HOW TO: Disable/Remove anonymoX from Mozilla Firefox:
1. Click on the Firefox, located at left upper corner of the web browser and go to “Add-ons”.
or press “Alt“, Menu bar pops-up, then go to Tools > Add-ons, or you can simply use shortcut key “Ctrl+Shift+A” to access add-on (extension) manger.
2. Now, click on “Disable” to disable the add-on temporarily or click “Remove” to remove the add-on permanently from the browser.
NOTE: Both options require restart for the actions to take effect.












 Privacy” />