Custom License
How to Bypass Geo-blocking to Access Content with Firefox Extension for Free.
ProxMate is add-on which lets its user bypass the geo-location based restriction to access your favorite content or service(s). ProxMate is available for all the popular browsers like Google Chrome, Mozilla Firefox and Opera.
Why you should use Proxmate (according to author)?
- Faster – Claims to be faster than VPN.
- Pluggable – ProxMate allows you to pick exact package of the service(s) which you would like to access.
- Secure – SSL will stay SSL.
- Open Source – No more secrets.
- Support.
Developer(s): Personalitycores.
Language support: English
Home page: ProxMate
Difficulty: 
Availability: 
![]()

Download: Add to Firefox
HOW TO: Installing ProxMate on Mozilla Firefox:
1. Go to ProxMate Mozilla add-on page, or simply click on the above download link and click on “Add to Firefox“.
2. If Mozilla Firefox asks user permission for installation of addon. Click “Allow” to continue installation, leave it to abort.
3. ProxMate installation box pops-up. Click “Install Now” to continue installing add-on, “Cancel” to abort installation.
4. On successful installation, ProxMate doesn’t require restart to activate the add-on.
HOW TO: Using ProxMate on Mozilla Firefox:
1. On successful installation, you will notice ProxMate button at top right side of the browser, next to Mozilla’s “Open menu“.
2. Click on it to install the package(s). You need to install specific package to bypass specific service restriction. For sake of testing, I tried Vevo.
3. Before and after installing the ProxMate’s Vevo package.
HOW TO: Disable/Remove ProxMate from Mozilla Firefox:
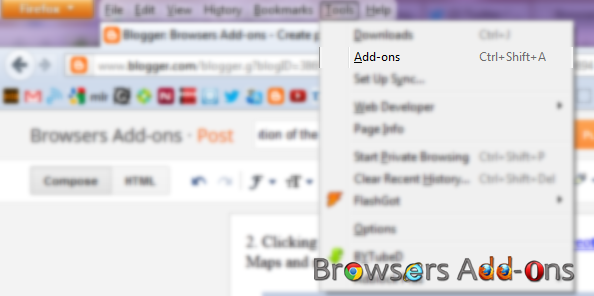
1. Click on the Firefox, located at left upper corner of the web browser and go to “Add-ons”.
or press “Alt“, Menu bar pops-up, then go to Tools > Add-ons, or you can simply use shortcut key “Ctrl+Shift+A” to access add-on (extension) manger.
2. Now, click on “Disable” to disable the add-on temporarily or click “Remove” to remove the add-on permanently from the browser.
NOTE: Both options doesn’t require restart for the actions to take effect.
How To: Speed Up Your Beloved Mozilla Firefox With Just An Add-On.
Fasterfox is an add-on for Mozilla Firefox which claims to improve the performance and tweak network to load the web-pages faster.
Developer(s): RsCcman Production.
Language support: English and other languages (20+).
Home page: Fasterfox
License: Custom License
Donate: Fasterfox
Difficulty: 
Availability: 
Download: Add to Firefox
HOW TO: Installing Fasterfox on Mozilla Firefox:
1. Go to Fasterfox Mozilla add-on page, or simply click on the above download link and click on “Add to Firefox“.
2. If Mozilla Firefox asks user permission for installation of add-on. Click “Allow” to continue installation, leave it to abort.
3. Fasterfox installation box pops-up. Click “Install Now” to continue installing add-on, “Cancel” to abort installation.
4. On successful installation, Fasterfox asks user permission to restart the browser. Restart the browser to activate the add-on.
HOW TO: Using Fasterfox on Mozilla Firefox:
1. After successful installation, you need to open Mozilla’s Add-on Manager and search for “Fasterfox” tab and click on the “Options“.
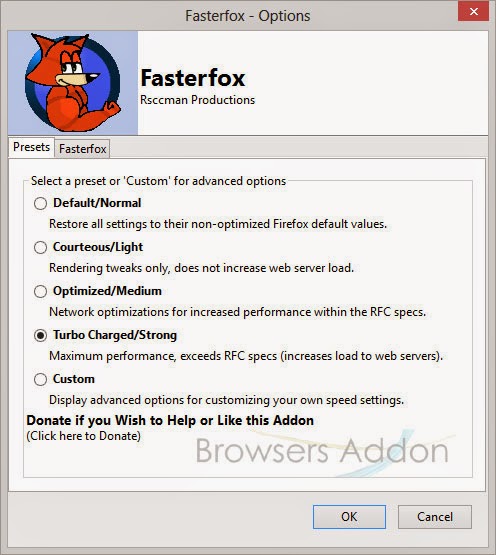
2. Select the desired Presets to change the performances.
3. If feel like pro, feel free to play with “Custom” option.
HOW TO: Disable/Remove Fasterfox from Mozilla Firefox:
1. Click on the Firefox, located at left upper corner of the web browser and go to “Add-ons”.
or press “Alt“, Menu bar pops-up, then go to Tools > Add-ons, or you can simply use shortcut key “Ctrl+Shift+A” to access add-on (extension) manger.
2. Now, click on “Disable” to disable the add-on temporarily or click “Remove” to remove the add-on permanently from the browser.
NOTE: Both options require restart for the actions to take effect.
CoolPreviews, An Add-on For Firefox Which Lets You Preview Images or Links From Current Page.
CoolPreviews is an add-on for Mozilla Firefox which lets its users to get a preview (hands-on) on images and link (website) from the current page without opening it. From the preview, you can open the previewed page in new tab, email it to your friend or temporary bookmark to stack.
Developer(s): The Cooliris Team
Language support: English
Home page: CoolPreviews
License: Custom License
Support: Click Here
Difficulty: 
Availability: 
Download: Add to Firefox
HOW TO: Installing CoolPreviews on Mozilla Firefox:
1. Go to CoolPreviews Mozilla add-on page, or simply click on the above download link and click on “Add to Firefox“.
2. If Mozilla Firefox asks user permission for installation of add-on. Click “Allow” to continue installation, leave it to abort.
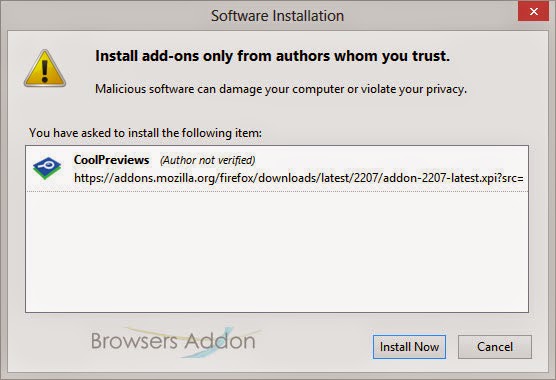
3. CoolPreviews installation box pops-up. Click “Install Now” to continue installing add-on, “Cancel” to abort installation.
4. On successful installation, CoolPreviews asks user permission to restart the browser. Restart the browser to activate the add-on.
HOW TO: Using CoolPreviews on Mozilla Firefox:
1. On successful installation, you will be redirected to CoolPreviews welcome page.
2. By default, CoolPreviews is activated only for popular sites like Google, twitter, Amazon, Wikipedia, Dictionary and Bing. You can tweak than in Options.
3. To get a preview, just hover mouse over desired link or image, CoolPreviews icon emerges, click on it or hover over it to get a preview.
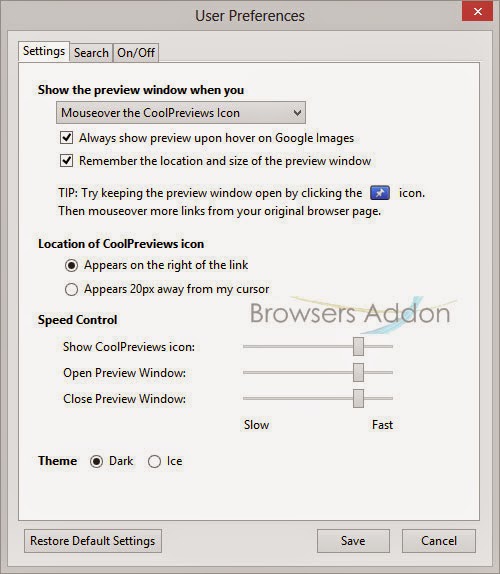
4. To access preferences, go to Mozilla Firefox Add-ons Manager, search for “CoolPreviews” tab and click on “Options“.
HOW TO: Disable/Remove CoolPreviews from Mozilla Firefox:
1. Click on the Firefox, located at left upper corner of the web browser and go to “Add-ons”.
or press “Alt“, Menu bar pops-up, then go to Tools > Add-ons, or you can simply use shortcut key “Ctrl+Shift+A” to access add-on (extension) manger.
2. Now, click on “Disable” to disable the add-on temporarily or click “Remove” to remove the add-on permanently from the browser.
NOTE: Both options require restart for the actions to take effect.
Know the location of the website’s server using Flagfox for Firefox.
Flagfox is a Mozilla Firefox addon (extension) which helps user to know the server location of the website. Apart for location service, Flagfox is loaded with other statistical tools like whois, site saftey checks, URL shortening and many more interesting features.
Author(s): Dave Garrett
Developer(s): Dave Garrett, Richard van der Leeden
Written in:
Language support: English
License: Custom License
Home page: Flagfox
Source:
Donate:
Difficulty: 
DOWNLOAD: Add to Firefox
HOW TO: INSTALL FLAGFOX ON MOZILLA FIREFOX:
1. Go to Flagfox addon page, or click on the above download link and click on “Add to Firefox“.
2. Now, Firefox ask user permission, click on “Allow“.
3. Flagfox Installation box pops-up, after three seconds click on “Install Now” to add addon to browser or “Cancel” to stop installing addon.
4. Now, Flagfox ask user to restart the browser in order to activate the working of addon, click “Restart Now“.
HOW TO USE FLAGFOX FOR FIREFOX:
1. Now, you can see the country flag beside star icon (Bookmark icon) when ever you open a web pages. Hover the cursor over the flag icon to know more about the server location data.
2. Clicking on the flag icon, Flagfox forwards to Geotool, showing the server location on Google Maps and much more data.
HOW TO DISABLE/REMOVE FLAGFOX FROM MOZILLA FIREFOX:
1. Click on the Firefox located at left upper corner of the web browser and go to “Add-ons”.
or press “Alt“, Menu bar pops-up, then go to Tools > Add-ons, or you can simply use shortcut key “Ctrl+Shift+A” to access addon (extension) manger.
2. Now, click on “Disable” to disable the addon temporarily or click “Remove” to remove the addon permanently from the browser.
NOTE: Both options require restart for the actions to take effect.


